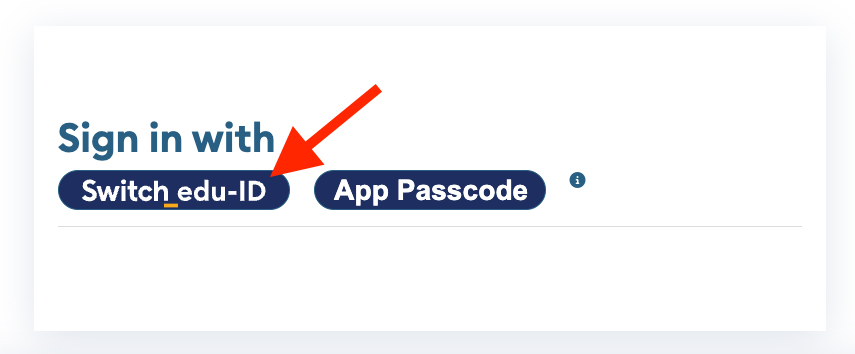
You need to enter the email address and the password that you also use to login to your Switch edu-ID account. Just go to the web page https://drive.switch.ch and click on the blue Switch edu-ID button:
If you do not remember if you have already created a Switch edu-ID account in the past, go to this web page and enter your email address: https://eduid.ch/reset-password
If a Switch edu-ID account exists, then an email will be sent to this address. If no Switch edu-ID account exists, you get this error message:

You can easily create a new Switch edu-ID account by clicking on the button "Create Account".
If you do not remember your password, click on the link "Help" and read the information how to reset your password.
On the Switch edu-ID login page (see https://eduid.ch) click on the link "Help" and read the information how to reset your password. You need to access your email inbox in order to reset your password.
To reset your password, you also need to enter a valid email address:

Because of spam filters it may take a few minutes until you receive the e-mail. Click on the verification link in the email or enter the verification code to continue.
Enter or select a strong password and store it in a password manager (e.g. iCloud Keychain, Bitwarden or other password managers) and click on the Continue button.
Once the password reset process is completed you can close this browser window and use the new password from now on.

If you cannot add the multi factor authentication (MFA) code, you need to disable the MFA in your Switch edu-ID account.
Go to this web-page https://eduid.ch/mfa-recovery and select if you want to recover via SMS to your mobile device or via recovery code.

If neither of these option works for you, you need to send a support ticket to eduid-support@switch.ch and request a reset of the Multi Factor Authentication in your Switch edu-ID account. Please add a scan of your identity document (passport, identity card) to your email.
As a SWITCHdrive user you can access the service using a web client, desktop and mobile applications. AAI is supported very well for the web client login. On the other hand there is currently no user-friendly AAI integration for the desktop and mobile applications. Therefore we are offering access to SWITCHdrive with the SWITCH edu-ID account.
With this account it is also possible to use WebDAV and future cloud services, which would not be the case if an AAI-Login is used.
No, creating a Switch edu-ID account does not automatically create a SWITCHdrive account. Make sure that your home organisation is linked to your SWITCH edu-ID account, then open the web page https://cloud-id.switch.ch.
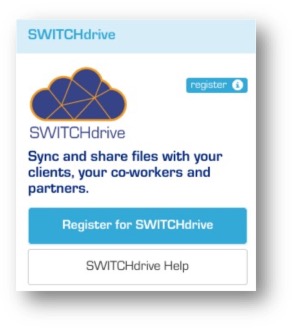
If your linked institution has subscribed to SWITCHdrive, click on the blue button "Register for SWITCHdrive":
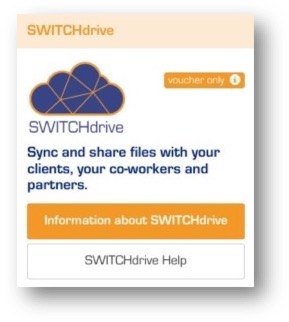
 If you are not able to add a home institution or if your linked institution has not subscribed to SWITCHdrive, you need to contact drive-support@switch.ch and ask for a "SWITCHdrive Voucher":
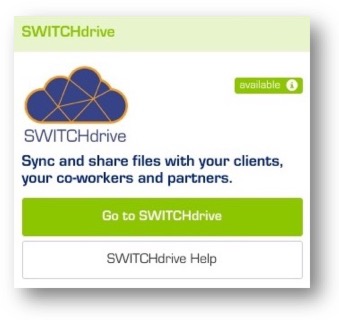
 Please note: You have to login at least once to your SWITCHdrive account so other SWITCHdrive users are able to search for your name and to share data with you. Click on the green button "Go to SWITCHdrive" or open a new web browser and type in the web address https://drive.switch.ch.
In most cases, you may just have missed the last step in the onboarding process, which is the registration for this service. If you see the error message that the login has failed, just click the blue link in the error message to register SWITCHdrive. Then try again to login. If this still fails, get in contact with the SWITCHdrive support.
Click here for a detailed description how to register SWITCHdrive.
A SWITCHdrive voucher is a secret link that allows anyone who receives this link to create a full SWITCHdrive account with own quota. A SWITCHdrive voucher link can only be used once and is connected to the creator of the voucher link and to the user who has activated the voucher link.
For example:
SWITCHdrive vouchers can be used to add external project members without an affiliation to a Swiss University to the SWITCHdrive community so sharing data among project members becomes easier and more secure. If your external project member has a full SWITCHdrive account, he or she does not need to get public links any more which requrire to download or upload files via Web-Client which is error prone and time consuming. Instead your external project member can use the SWITCHdrive Sync-Client to automatically keep all the project data in the local switchdrive folder perfectly synchronised.
Please refer to this page to see if your institution allows SWITCHdrive vouchers and how to request them. You can also ask to delete a SWTICHrive voucher if the external partner does not need to access the data on SWITCHdrive any more.
Note:
By activating a SWITCHdrive voucher, your external partner will be added to the address book of SWITCHdrive. You can then use direct links to share files and folders with your external partner. Just enter the first name and last name of your external partner in the User & Group search box and then select the appropriate name with "eduid" in brackets.
Congratulations! With a Switch Drive Voucher you are allowed to become a full member ofSwitch Drive, the academic Sync & Share service for Swiss universities and institutions of higher education.
Before you click on theSwitch Drive Voucher link make sure you have created a SWITCH edu-ID and you know your password (if you have not created an SWITCH edu-ID yet, click on this link, if you do not remember your password click on this Forgot password link).
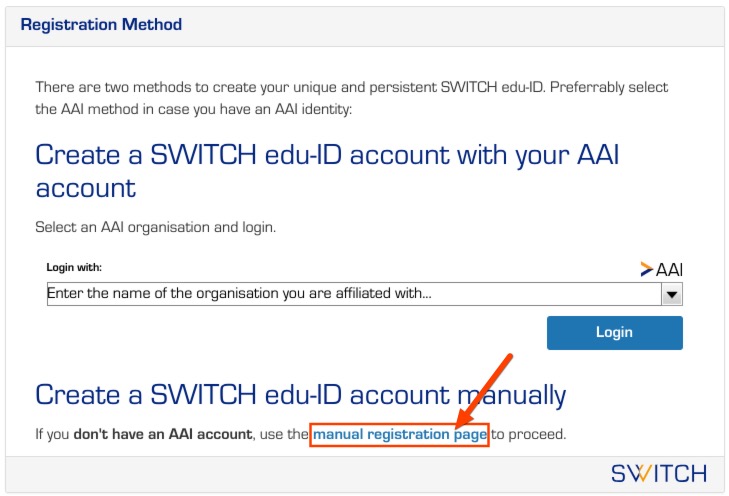
Click this link for a detailed instruction how to create a SWITCH edu-ID. Because you have received aSwitch Drive Voucher, you probably do not have an AAI account, so click on the link "manual registration page" and fill out the following forms to create a new SWITCH edu-ID.
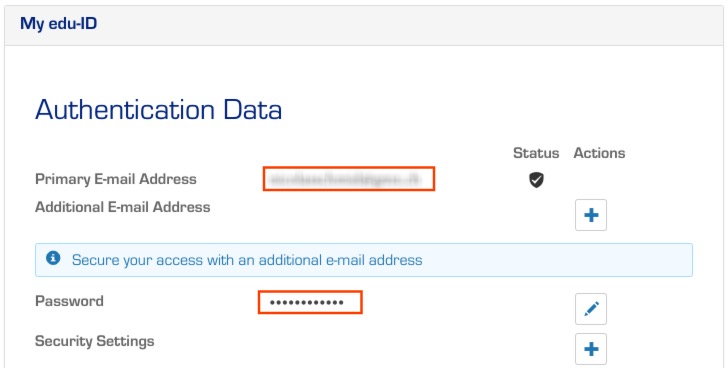
Remember your email address and your password well as you need them to login toSwitch Drive! You may also add additonal email addresses which you can use to login to switchdrive as well.
Note: the primary email address will be used in Switch Drive to send you activity messages and other important information if you have set some switchdrive settings accordingly. You can change these settings at any time in your personal Switch Drive configuration.
Click now on the Switch Drive Voucher link and accept the Terms and Conditions of SWITCH if you agree to them. Then click on the blue button "Registation for SWITCHdrive".

That's it, your SWITCHdrive account is now set up and ready to go. Login to https://drive.switch.ch in a new browser window or click on the green "Go to SWITCHdrive" button on the displayed web page:

In order to delete your Switch Drive account, follow these steps:
1. Open the web-client of your switchdrive-account (login to https://drive.switch.ch)
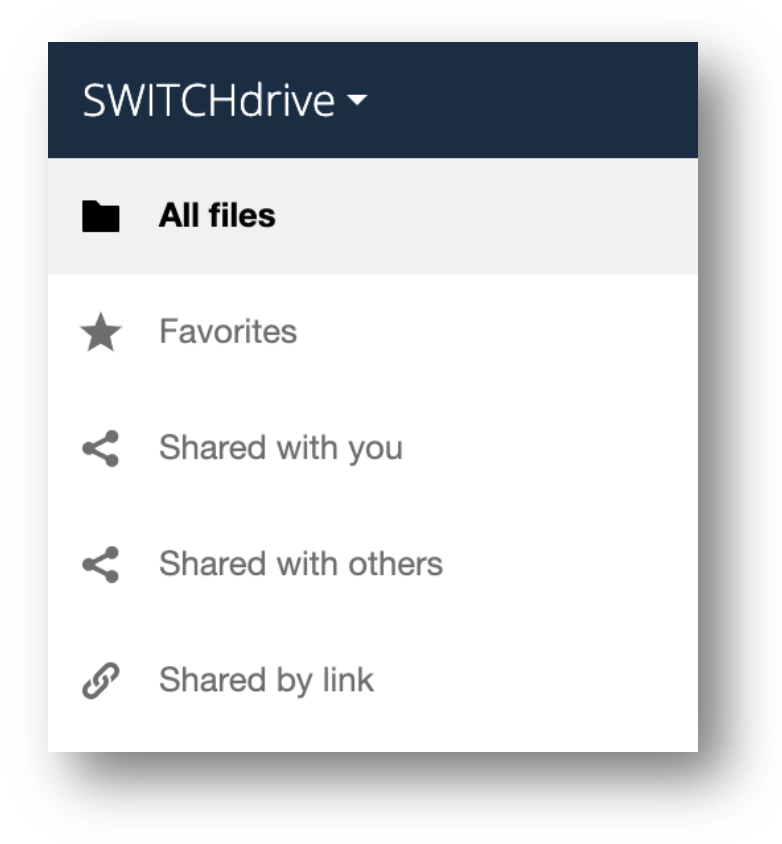 2: Click on "Shared with you" and decline all shares that you have received from other users
3: Click on "Shared with others" and remove all the shares that you have given to other users. Maybe you should inform your users beforehand that the shares will disappear so they could create a local copy of your shared data if needed.
4. Click on "All files" and bulk mark all of them. Then click on the delete icon to move them to the folder "Deleted files"
5. Log out of Switch Drive on all devices and do not login again. Uninstall the Switch Drive sync client and any mobile clients from all your devices.
Note:
- your Switch Drive account will automatically be deleted after some time because of inactivity (we usually wait 3 more months after an inactivitly of 1 year before an account gets deleted)
- if you decide to return to Switch Drive you can do so as long as you can still login to your switchdrive account. If you have no active affiliaton to any institution which has subscribed to Switch Drive you may be blocked from login again.
- you can restore any deleted files during 90 days after you have deleted them. After 90 days the deleted data is permanently removed from the switchdrive servers and cannot be restored.
- if you want to empty your trashbin, open the folder "Deleted files", mark all entries and click on the delete icon. All files will be permanently deleted immediately and your Switch Drive account will be completely empty.
If you have not used your Switch Drive account for more than one year then your Switch Drive account will be deactivated and you will receive the following message by email: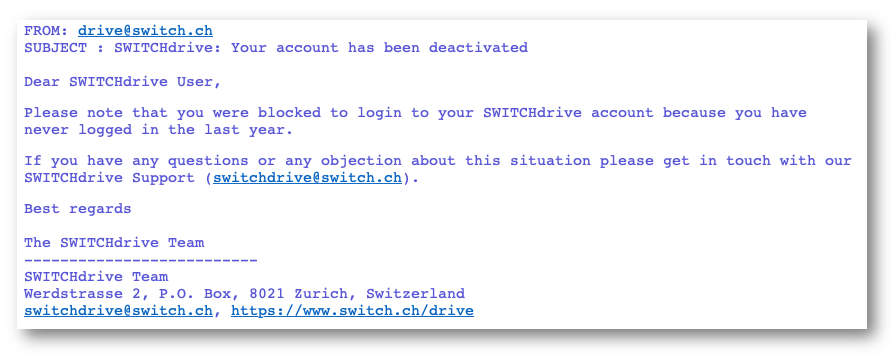
Your data on Switch Drive is still available and all shares that you have received from other SWITCHdrive users are still valid. You can simply send an email to the Switch Drive support team and request to reactivate your account. Usually you will receive a fast response and are allowed to login to your Switch Drive account again.
Please check if all your data is fully accessible. If you have data shared with other users you need to be share them again. It's maybe a good chance to review all your shares to other users and carefully decide if they still need your data, as you have not touched your data for more than one year.
To avoid this deactivation-message, just login to your Switch Drive account at least once per year, either by Web-Client (see htttps://drive.switch.ch) or by Sync-Client, which keeps your files automatically synchronised by running in the background.
Please note: If you do not react to the deactivation message within 3 months then your Switch Drive account and all its data will be permanently removed from our servers and cannot be restored any more.
Please check the following:
1. Are you able to login to your SWITCHdrive account via web-client?
If not, then check your web-connection and the current status of SWITCHdrive.
2. Is your SWITCHdrive sync-client installed and running?
You should have a small switchdrive cloud icon ( ![]() ) in the menu-bar (Mac) or status-bar (Windows).
) in the menu-bar (Mac) or status-bar (Windows).
If there is no such icon, open your application folder and launch the switchdrive sync-client.
3. The switchdrive icon can have several colors indicating its current status:
- (
 ) - green: everything is fine and all files are synchronised
 - (
 ) - blue: synchronisation is active (turning arrows)
 - (
 ) - blue: synchronisation is paused (2 vertical lines). Resume the synchronisation if applicable.
 - (
 ) - white with exclamation mark: switchdrive has encounted some minor issues which needs your attention (eg. conflict files)
 - (
 ) - red: switchdrive has encounted a severe problem which needs your attention
 - (
 ) - grey: the connection to switchdrive is briefly or permanently interrupted
Check if you are logged in to your switchdrive account and log in if this is not the case!)
4. If your switchdrive icon is grey or red over a longer period of time, then get in touch with switchdrive support: Click on https://help.switch.ch/drive/contact/ and fill out the form.
Please add a screenshot your your switchdrive settings indicating the main error and / or the list of not synced items (note that you can resize the switchdrive settings window so the error messages or the issues can be fully displayed):

When you try to login to your SWTICHdrive account via Web-Client and you see the following message, then your SWITCHdrive account has been disabled:
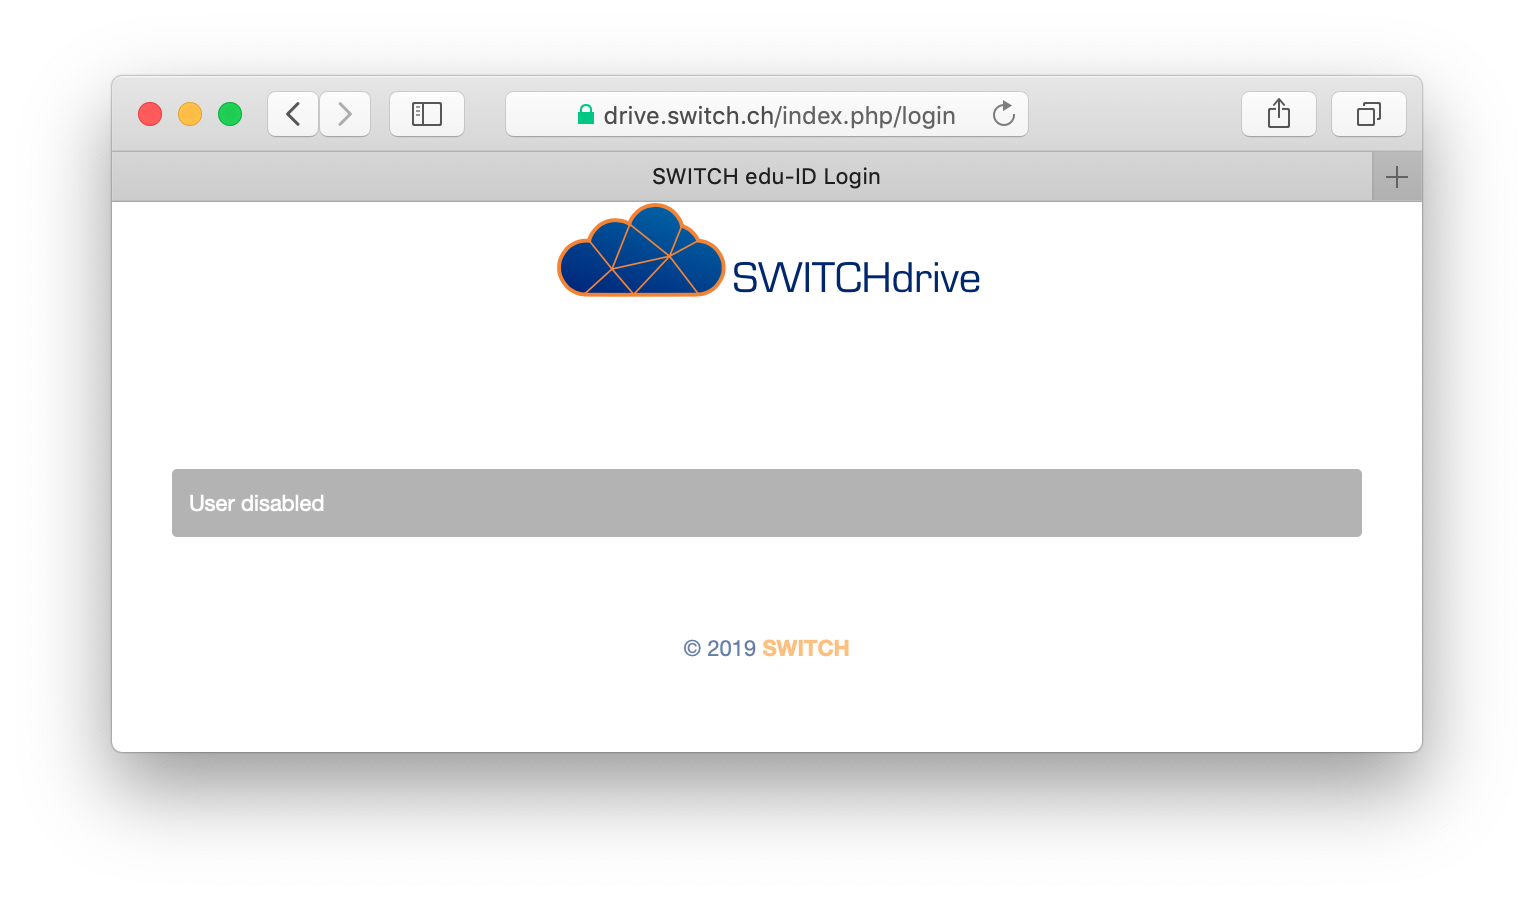
Maybe you have not logged in to your SWITCHdrive account for more than one year or you have lost your affiliation to your home organisation and your account was disabled by a local admin. Or maybe there was a technical issue that caused your account to be disabled for a certain time.
You need to get in touch with your local SWITCHdrive administrator or with the SWITCHdrive support team and ask for re-activation of your account. Usually the support team will quickly re-activate your account, if there are no objections to do this.
Please note that SWITCHdrive is reserved for members of Swiss universities and other institutions of higher education which have subscribed to this service of SWITCH. If you have recently lost your active affiliation to your home institution you need to add a new affiliation to another institution of higher education in your SWITCH edu-ID account. Check your affiliations by logging into your SWITCH edu-ID account on the following web-page: https://eduid.ch
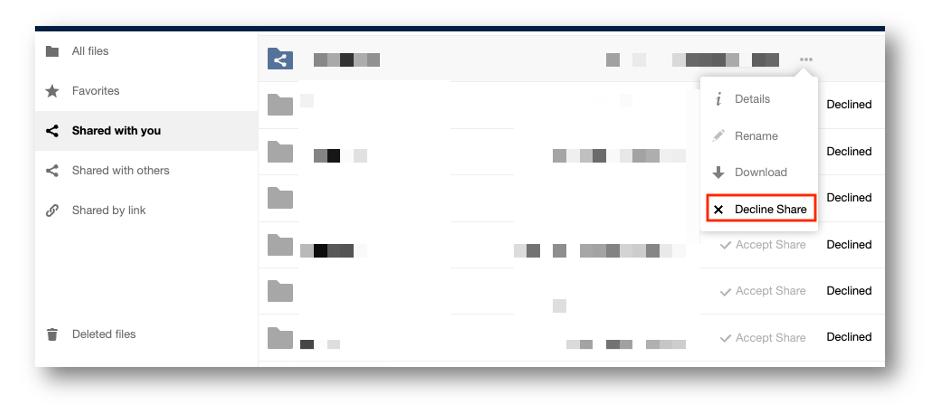
If there are no requests from other users to access any blocked data, SWITCH will delete the SWITCHdrive account after a grace period of 3 months. If we get a request to access some blocked data, SWITCH will carefully investigate together with the corresponding SWITCHdrive administator if access to the blocked data can be granted or not.
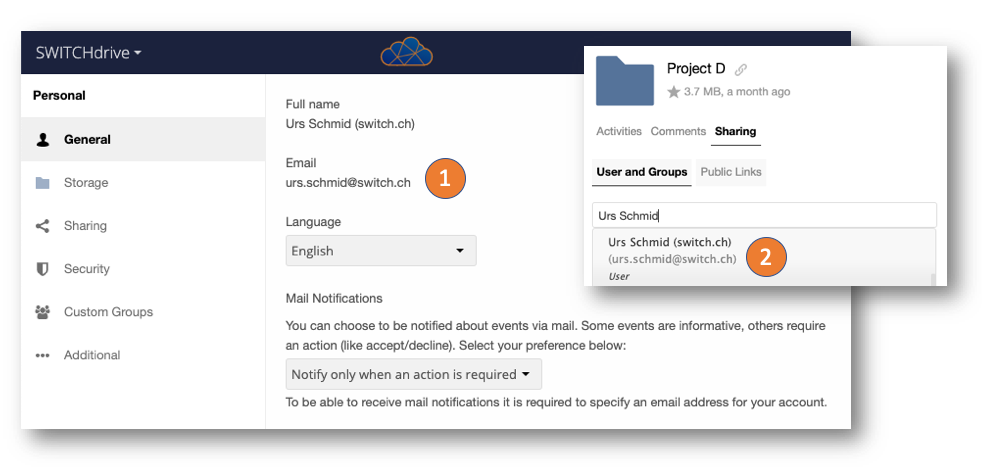
If you are a member of more than one organisation, you cannot create multiple SWITCHdrive accounts. You can however change your affiliation which is displayed when you login to your SWITCHdrive account via Web-Client (1). The same affiliation is also shown to other switchdrive users when they want to share something with you and search for your name (2).
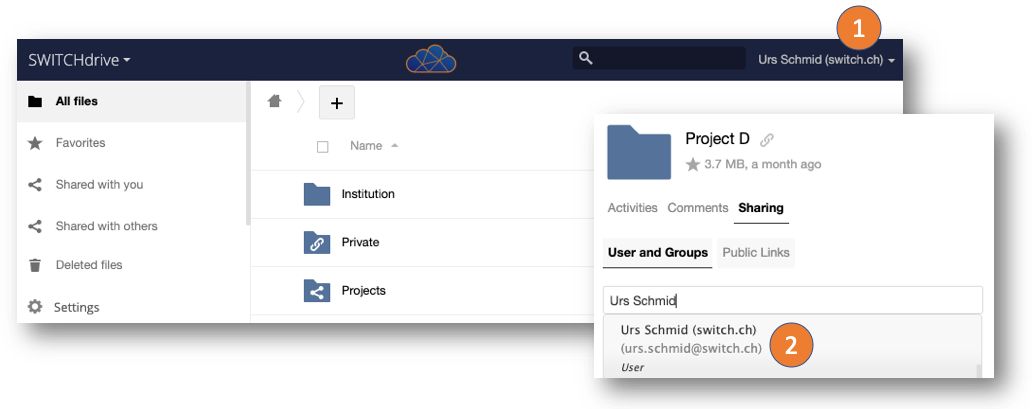 If you want to change your affiliation you need to send a support ticket to drive-support@switch.ch and ask to change it. Please make sure that you have indeed multiple affiliations in your SWITCH edu-ID and that your organisation is a member of the switchdrive community.
SWITCHdrive is using the contact e-mail address that you have stored in your SWITCH edu-ID account.
This email address is also listed in your personal settings (1) and is used for sending all kinds or notifications about actions or activities to you.
The same email address is also used to clearly identify you when other switchdrive users search for your name and want to share data with you (2).
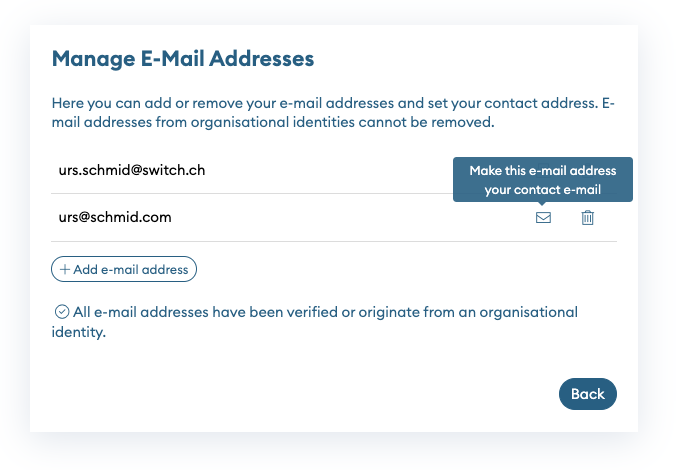
 If you want to change this email address you have to login to your SWITCH edu-ID account. Go to your profile page and click on the link "Manage e-mail addresses". This will show you a list of all confirmed email addresses that you have listed in your SWITCH edu-ID account. Click on the button "Add e-mail address" to add a new email address and follow the instructions on this web-page. Finally click on the "Envelope" icon behind an email address to set this email address as the new contact email address.
Why do I get an error message about some localhost settings when I try to authorise the Sync Client?
When you want to install the SWITCHdrive Sync Client you have to authorize this appllication to access your data in your SWITCHdrive account. This is done in another browser window. In order to communicate between the Sync Client and the browser window, an internal communcation via TCP/IP is used.
To communicate correctly your own computer needs an internal IP address which is called "localhost". When a communication is established with the localhost, this communication remains internally on your PC and never goes out to the internet. It is also called "loopback" and is used during booting of your system.
If the localhost address is not set, then the communication between the Sync Client and the brower window is not possible and the authorisation of the SWITCHdrive Sync Client fails.
You can check if the localhost is set up correctly when you open a terminal window and type "ping localhost". You can also type "ping switch.ch" for comparison.
ping localhost
PING localhost (127.0.0.1): 56 data bytes
64 bytes from 127.0.0.1: icmp_seq=0 ttl=64 time=0.054 ms
ping switch.ch
PING switch.ch (130.59.31.80): 56 data bytes
64 bytes from 130.59.31.80: icmp_seq=0 ttl=62 time=7.687 ms
The first ping is returned in less then 0.1 msec because it is used internally while the other ping takes more then 7 msec because this ping goes out to the internet.
If the ping returns this error then the localhost is not configured correctly.
ping localhost
ping: cannot resolve localhost: Unknown host
The external authorisaton of the SWITCHdrive Sync Client will also fail and you have to edit the "hosts" file on your computer and make sure that it contains the following entries:
# Host Database
#
# localhost is used to configure the loopback interface
# when the system is booting. Do not change this entry.
#
127.0.0.1 localhost
::1 localhost
The hosts file usually only contains some comment lines starting with a "#" followed by two lines with the local IPv4 and IPv6 addresses for localhost.
To edit the hosts file in Windows 10:
1. In the Start menu, find the "Editor" entry and right-click on it. Select "Run as administrator".
2. In the Editor, go to the menu item "Open" under "File".
3. Open the "hosts" file in Windows Explorer via the path C:\Windows\ System32\drivers\etc\hosts.
4. You can now edit the hosts file.
To edit the hosts file in MacOSX and in Linux PCs:
1. open a terminal window
2. type "more /etc/hosts" and press enter - this will show you the content of the hosts file.
3. if the file does not contain the blue lines, enter sudo nano /etc/hosts and press enter
4. you may need to enter the password of the Computer to start editing the file
5. Press Ctrl-X to quit the editor and to save the changes to the hosts file
To connect your Zotero account to your Switch Drive account, you need to create an App-Passcode in your Switch Drive account, see here.
Copy the new App-Passcode and click on "Done":
Launch your Zotero application and open the zotero settings:

Replace the old password with the new App Passcode:
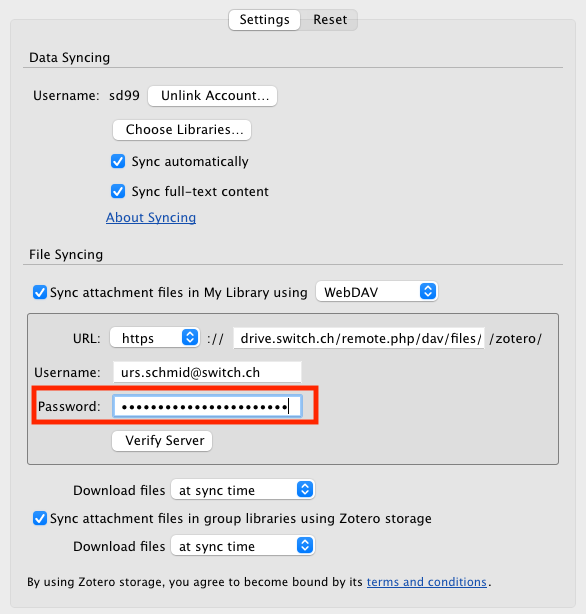
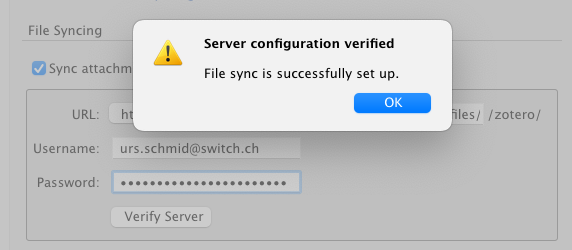
Finally click on the button "Verify Server". You should then see the following success message:
Rclone is a command-line program to manage files on cloud storage. It is a feature-rich alternative to cloud vendors own tools. If you don't have a GUI and want to sync data from or to Switch Drive this is probably the best solution for you.
Rclone Installation
There are different ways to install/run rclone. On Linux/macOS/BDS you can install it like this:
sudo -v ; curl https://rclone.org/install.sh | sudo bashAll installation options can be found on the rclone website: https://rclone.org/install/
Rclone Configuration
Switch Drive is based on ownCloud and is using the WebDAV protocol. You can find the rclone documentation about it here: https://rclone.org/webdav/
The configuration is pretty easy and you can start it with the following command:
rclone configOn the configuration you will need to enter the following parameters:
- Choose to create a new remote typing in an “n”.
- You will be asked to name the new remote destination, here we suggest using the name “SwitchDrive”.
- Afterwards you will need to configure the storage type. We use the WebDAV protocol on Switch Drive, so you need to type in “webdav” or the number it has on the list.
- Now rclone needs to know where it has to connect to, here you will need to enter your Switch Drive WebDAV path. This should be something like: https://drive.switch.ch/remote.php/dav/files/USERNAME/ (You can find your correct path in Switch Drive. After logging in, click on “Settings” in the bottom-left corner, then copy the path displayed under “WebDAV”.)
- Rclone needs to know what software you are going to use for this remote. This is in our case ownCloud, so you will need to type in “owncloud” or the number it has on the list.
- Now it’s time to configure your user. You will need to create a passcode and enter the username displayed there here. You can find out how to create a passcode here.
- Rclone will now ask you for a password that will be used to connect to Switch Drive. So here you will need to type in “y”.
- The configuration now asks you to enter your password, you will need to type it in twice. The password will not be shown on the terminal and it will be encrypted in the configuration file. You need to enter the password created with the passcode here, not the one you use to sign-in with edu-ID.
- This is basically it. For the bearer you can just press enter, skip the advanced configuration with “n”, keep the remote “SwitchDrive” with “y” and quit the config with “q”.
The config file rclone creates during the configuration process can be found in your home directory under the path “.config/rclone/rclone.conf”.
Check Config
We can check easily if our configuration was correct and succesful.
All directories on your Switch Drive can be listed with the following command:
rclone lsd SwitchDrive:
All files on your Switch Drive can be listed with the following command:
rclone ls SwitchDrive:
In case these two commands don’t work for you the configuration wasn’t correct. You can check it with “rclone config” again and modify/create it from scratch.
Use Rclone
If the configuration is done and you can list files/folders successfully from your Switch Drive account you are good to go to use rclone to transfer files from/to Switch Drive.
To upload files to Switch Drive using rclone you can use:
rclone copy /home/username/upload_folder/ SwitchDrive:destination/folder/
To download files from Switch Drive using rclone you can use:
rclone copy SwitchDrive:source/folder/ /home/username/download_folder/