SWITCHdrive is a cloud service which allows you to synchronise files & folders across multiple devices and to easily share data with other users. SWITCHdrive offers a secure alternative to well known, commercial cloud storage services.
SWITCHdrive can be used by members of participating universities. For a list or participating institutions click here.
If your institution has subscribed to SWITCHdrive, you can register to create a SWITCHdrive account on https://cloud-id.switch.ch
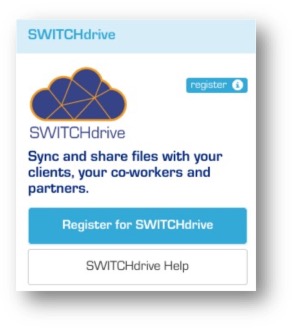 Click on the blue registration link and accept the terms & conditions of SWITCHdrive, then login to your new SWITCHdrive account on https://drive.switch.ch
External project members without an valid affiliation to a participating university can also use SWITCHdrive, but need to be invited by a SWITCHdrive user at an institution.
If you want to read these help pages in your own language, you have to use the translation option of your browser and to turn on auto translation of the web pages.
We recommend to use the Chrome Browser and the build-in translation service of Google (other bowsers may offer similar translation services).
To turn on automatic web page translation, follow these steps:
1. Click on the 3-dot menu at the end of the address line in the Google Chrome browser
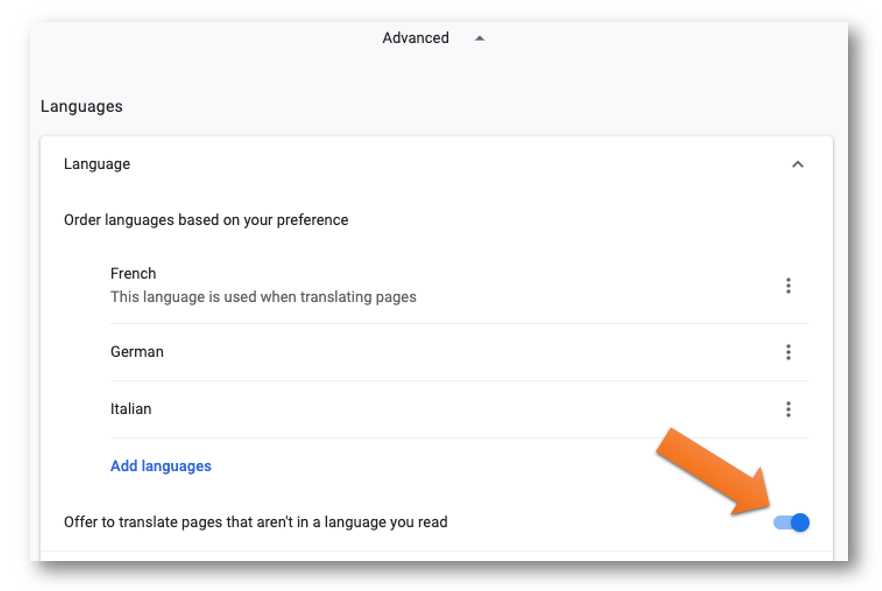
2. In the pop up menu select "Settings", then scroll to the bottom of the page and select "Advanced"
3. Open the "Language" section by clicking on the tiny up/down arrow on the right
4. Add the languages that you can read without translations
5. Activate the option to translate web pages that are not in a language you can read
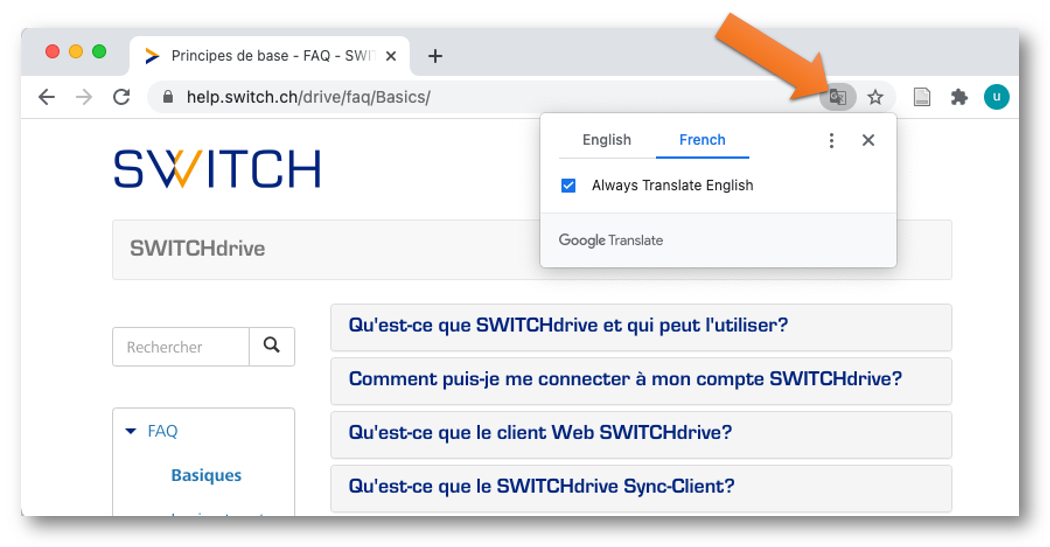
When you get to a web-page that is not in one of your preferred languages, click on the "translate" icon at the end of a web address. Turn on the option to always translate an English web page. Note that you can always switch back to the original (English) language of the web page.
You can connect to your SWITCHdrive account via Web-Client, via Sync-Client or via Mobile-Client.
We call any software which is connected to your SWITCHdrive account a "Client". You can have as many clients connected to your SWITCHdrive account as you want.
Usually you have one main (office-) PC connected to your SWITCHdrive account, but maybe another one at home and also a Mobile-Client running on your phone or on your tablet. It is even allowed to have a Sync-Client and one or more Web-Clients running side by side on the same PC.
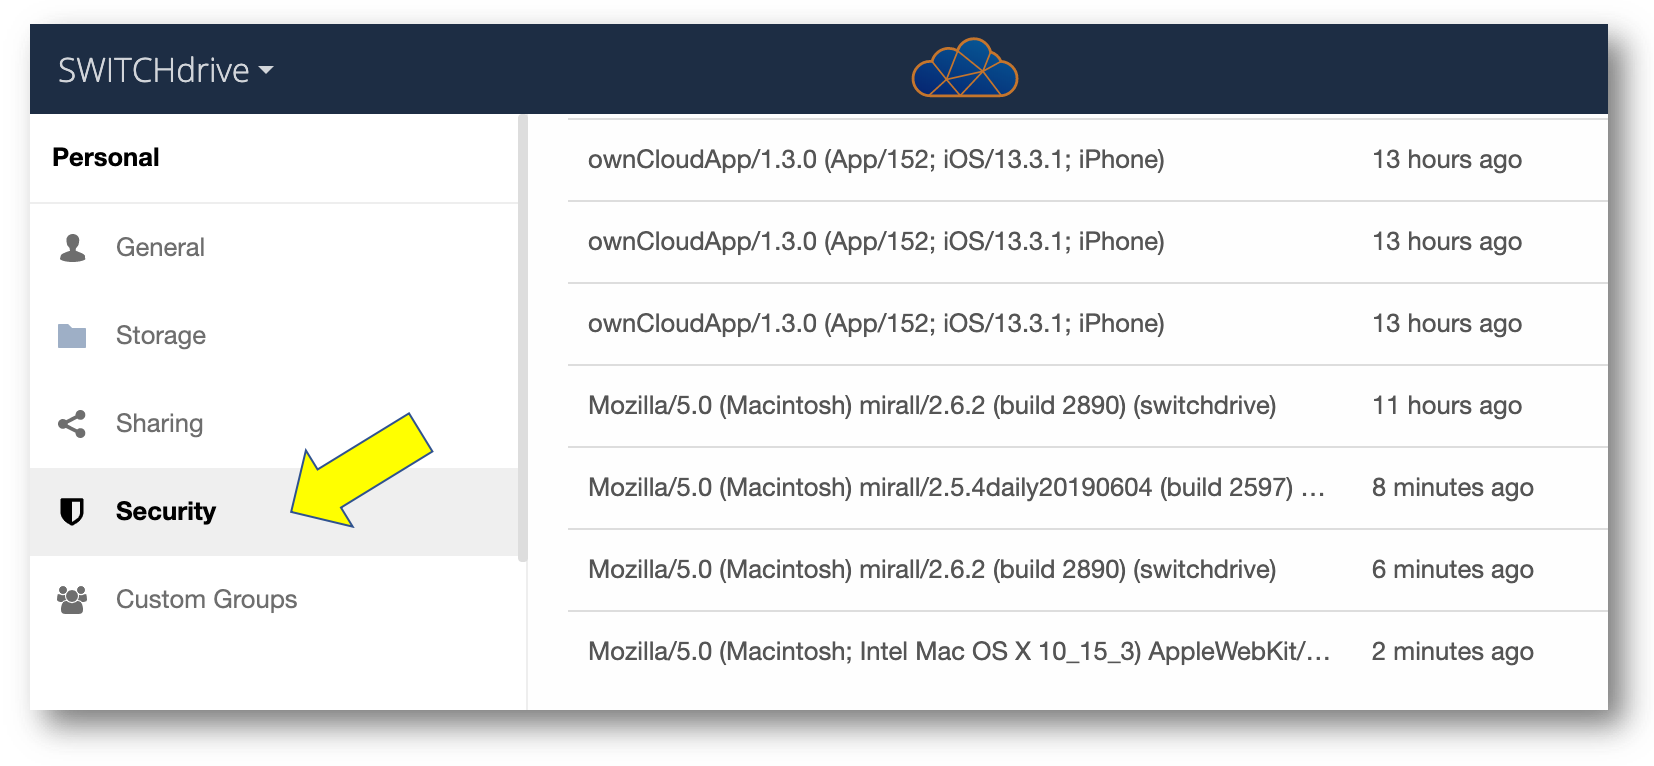
An overview how many Clients have access to your SWITCHdrive account can be found in the security section of your switchdrive settings when you login to your account with the Web-Client:
The easiest way to access your SWITCHdrive account is via SWITCHdrive Web-Client:
Just open a standard web browser (eg. Safari, FireFox, Chrome, Edge or any other current web broswer) and enter the web address: https://drive.switch.ch
The following login screen will be displayed:
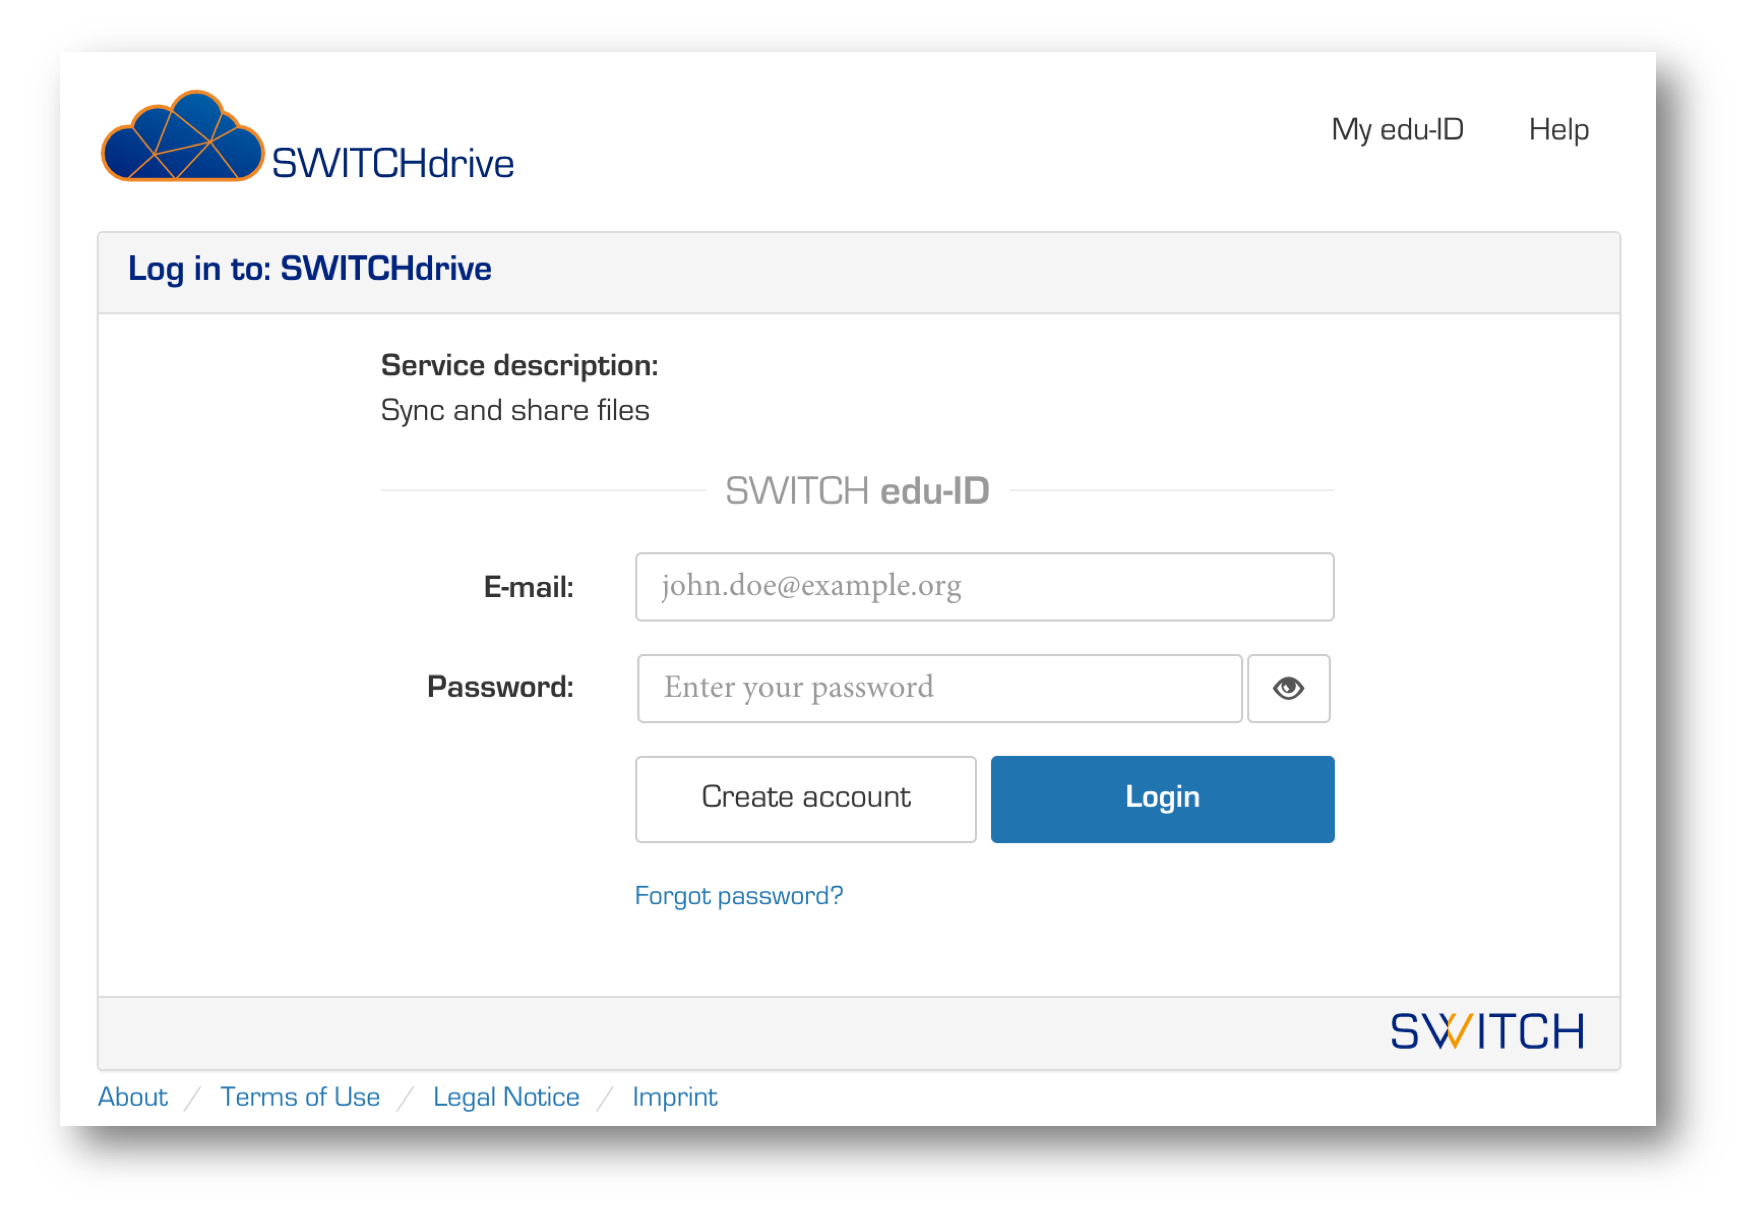
Type in your email-address and and your password that you have used when you have created your SWITCH edu-ID. If you do not remember your password to access your SWITCH edu-ID, click on the link "Forgot password?", otherwise click on the blue Login button.
The web-brower will then show you the content of your SWITCHdrive account. Click on the small down arrow in the top right corner to go to your personal switchdrive settings, to open the switchdrive help pages or to log out of your switchdrive web-client.
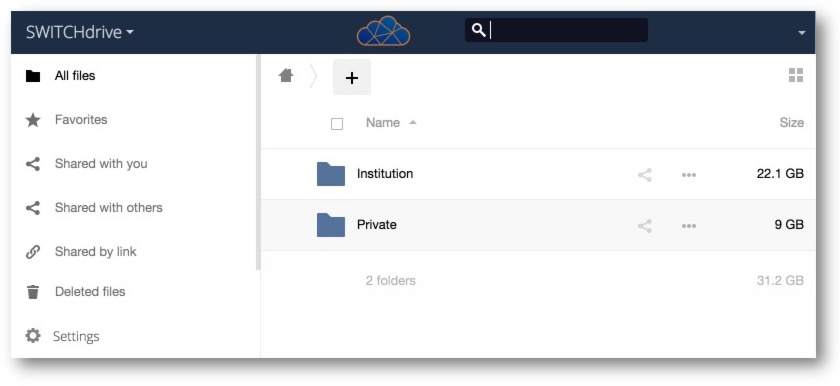
To upload some data to your SWITCHdrive account, simply drag the files or folders to onto the browser window. You can also create new folders by clicking on the "+" icon.
The SWITCHdrive Sync-Client is an applicaton that runs in the background of your computer and synchronises all the files in your SWTICHdrive account without any interaction from your side.
The Sync-Client stores all the files of your SWITCHdrive account to a local folder called "switchdrive" so you can work with them even when you have no internet connection. As soon as the internet connection is established again, the Sync-Client uploads and downloads all the changes that have happened during the time when you were offline.
When the SWITCHdrive Sync-Client is running, all the files in your local switchdrive folder will receive tiny icons to indicate that the files were successfully synchronised.
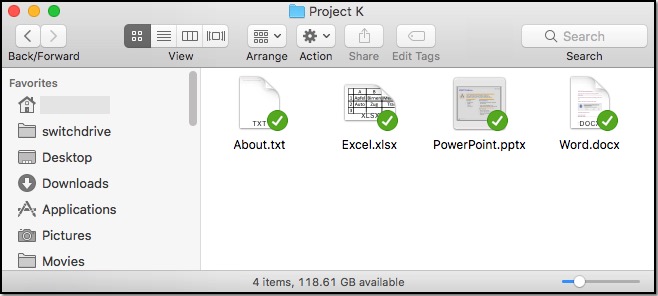
You can see the current status of the SWITCHdrive Sync-Client by locating the small switchdrive icon in the menu bar or status bar of your computer. If it is green, then everything is fine. If not, then SWITCHdrive is busy synchronising your data or you may have a problem. See here what to do in that case.

When you use the SWITCHdrive Sync Client you do not need to manually upload or download any file to your SWITCHdrive account any more. Just continue to use the File Explorer or the Finder to access all your files as before. You can also use your favorite application to open, view or edit your files.
If you want to have some data synchronised or shared with other users just move the data into your local switchdrive folder. The SWITCHdrive Sync-Client will immediately start a sync action and uploads the changes to your SWITCHdrive account. This is also true if you create, modify or delete any data in your local switchdrive folder.
If another SWITCHdrive user has shared data with you or has modified any of your shared files, the Sync-Client will detect this change and downloads the changes to your local switchdrive folder.
Therefore, when the SWITCHdrive Sync-Client is running, all your files are always up-to-date, but only if you are connected to the web and only if the status of the Sync-Client indicates that everything is fine!
To access your SWITCHdrive account via Sync-Client or Mobile-Client, you have to download and install some software first. Go to Downloads in this help section or open your personal SWITCHdrive settings in the Web-Client. Scroll down until you see these download buttons and click on one of them.

In oder to install the SWITCHdrive Client software on your computer, you need to have administation permission. Please talk to your local helpdesk if this is the case (for example when you have received a managed computer supplied by your home organisation).
Locate the downloaded SWITCHdrive Client sofware package and double click it. The installation will start and guide you through the few installation steps. Click on "Continue" and follow the default recommendation to install this software.
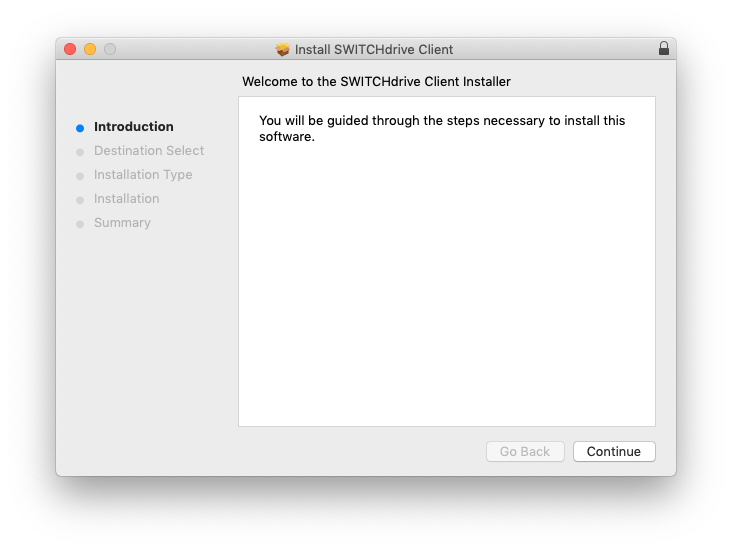
During the installation you will be asked to enter the password (or the fingerprint) to install the SWITCHdrive Sync-Client into the application folder of your computer.
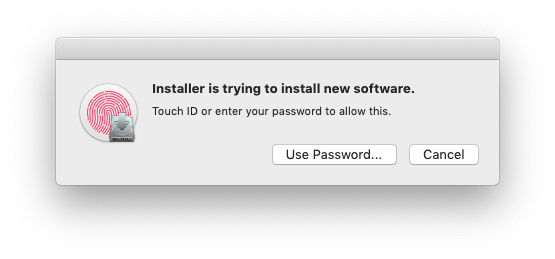
When the installation is complete, close the installation window. The SWITCHdrive Sync Client automatically detects when a new version is available and asks you if you want to update it.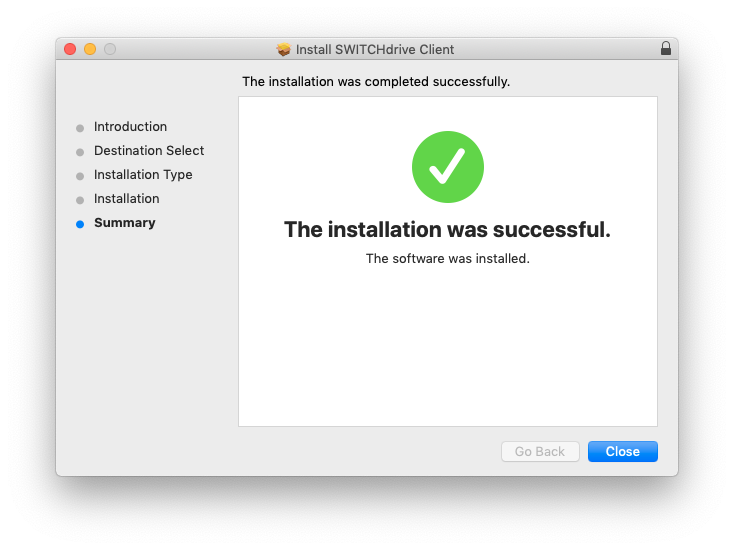
Once you have installed the SWITCHdrive Sync-Client to your computer, go to your Application Folder and locate the application "switchdrive.app". Then double click it to launch the application.
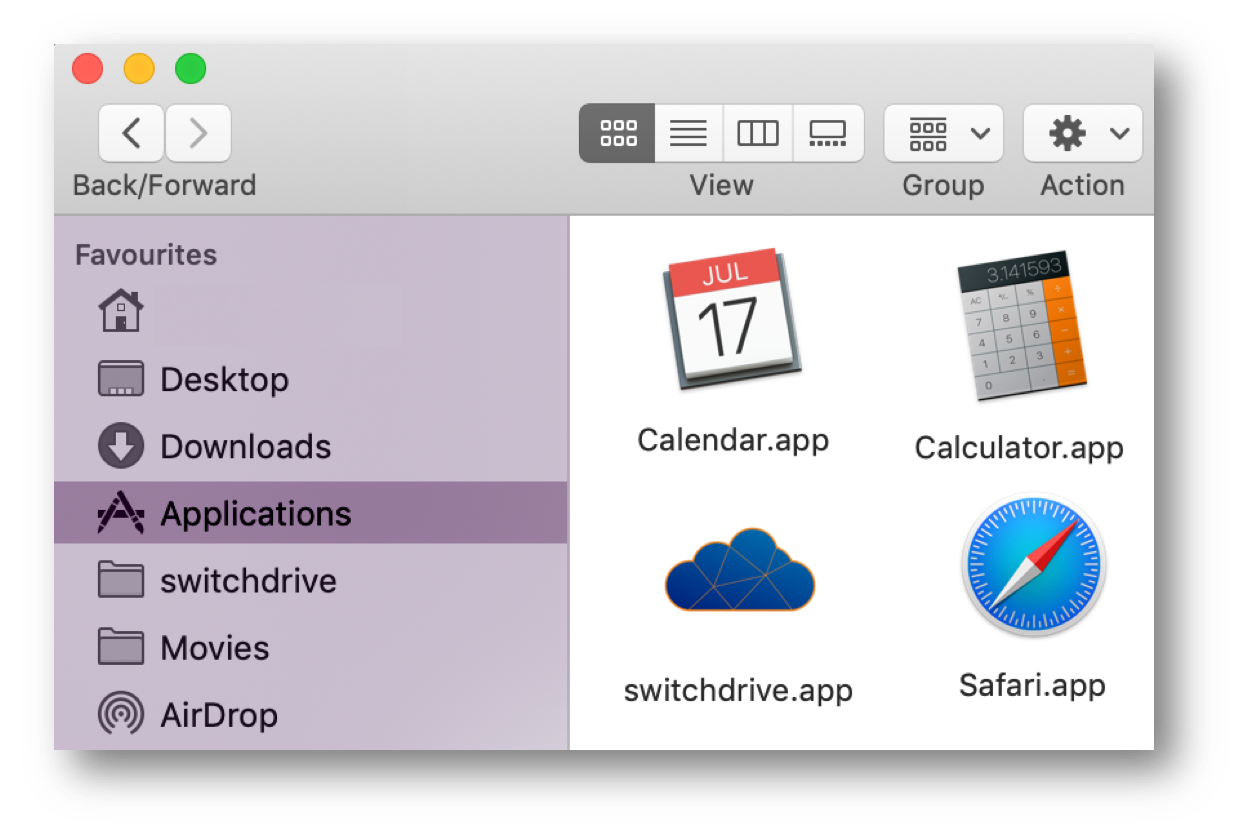 When you do this the very first time, a SWITCH edu-ID login window will pop up and ask you for your email address, your password and for your authorization to access your SWITCHdrive account. Type in your email address, your SWITCH edu-ID password and then click on the "Authorize" button.
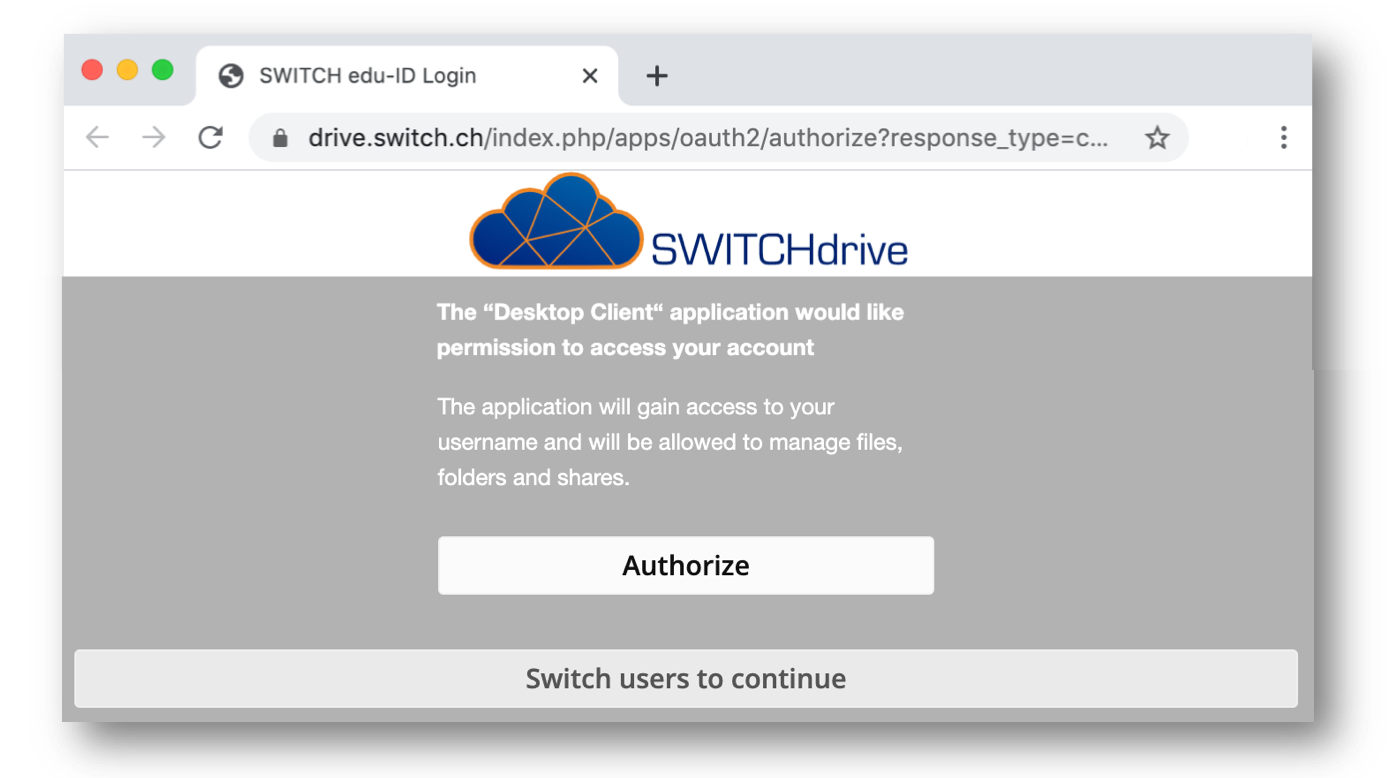 You only need to enter these details once, so whenever you quit the SWITCHdrive Sync-Client and restart it, it will launch again and run in the background without asking you for these details or showing a user interface.
The only sign that the SWITCHdrive Sync-Client is running is a small cloud icon in the menu bar or status bar on your computer.
Because it is important to keep an eye on the status of the SWITCHdrive Sync-Client, move the small switchdrive icon somewhere in your menu bar or status bar so you can easily spot it (for example next to the WiFi icon, so you can also quickly see if your computer has an active WiFi connection to the web).
Locate the SWITCHdrive Icon in the menu bar (MacOSX) or in the status bar (Windows) of your computer and right click it to open the drop-down (or drop-up) menu.
Note that you can easily open your SWITCHdrive account in the browser or open the local switchdrive folder on your computer when you click the 3rd menu item.
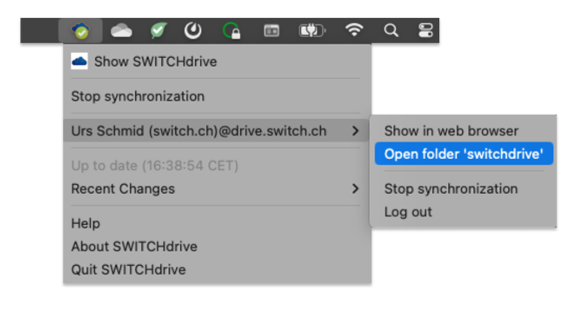
To open the SWITCHdrive settings select the first menu item "Show SWITCHdrive". You can configure your SWITCHdrive Sync-Client in the sections "Account", "Activtiy", "General" and "Network".
The "Account" section gives you an overview of your SWITCHdrive account: which user name was used to login to your account, how much of your available storage was used so far and which folders have been selected to be synchronised to your local switchdrive folder.
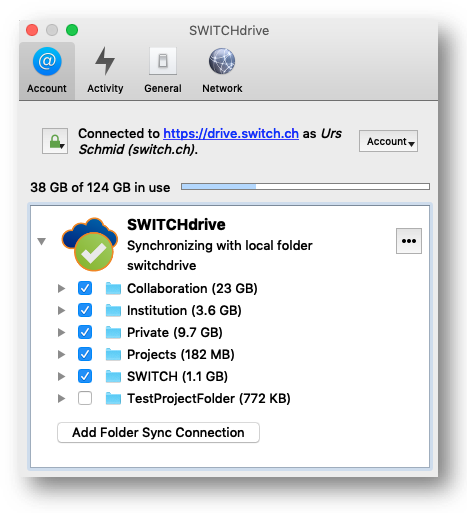
If you want to exclude a subfolder from synchronisation just remove the (blue) checkmark. In the example above, the folder "TestProjectFolder" was excluded from synchronisation, that means that this folder does not exist locally on the harddisk. You can still go to this folder via Web-Client or add the checkmark so it gets synchronised again to your local harddisk.
Both SWITCHdrive clients have their specific advantages. It is important to know that no matter which client you choose, you can be confident that SWITCHdrive stores a copy of your files in the cloud, so even if you loose your computer or have a harddisk crash, you can always synchronize the content of your switchdrive account to another computer or to new local switchdrive folder.
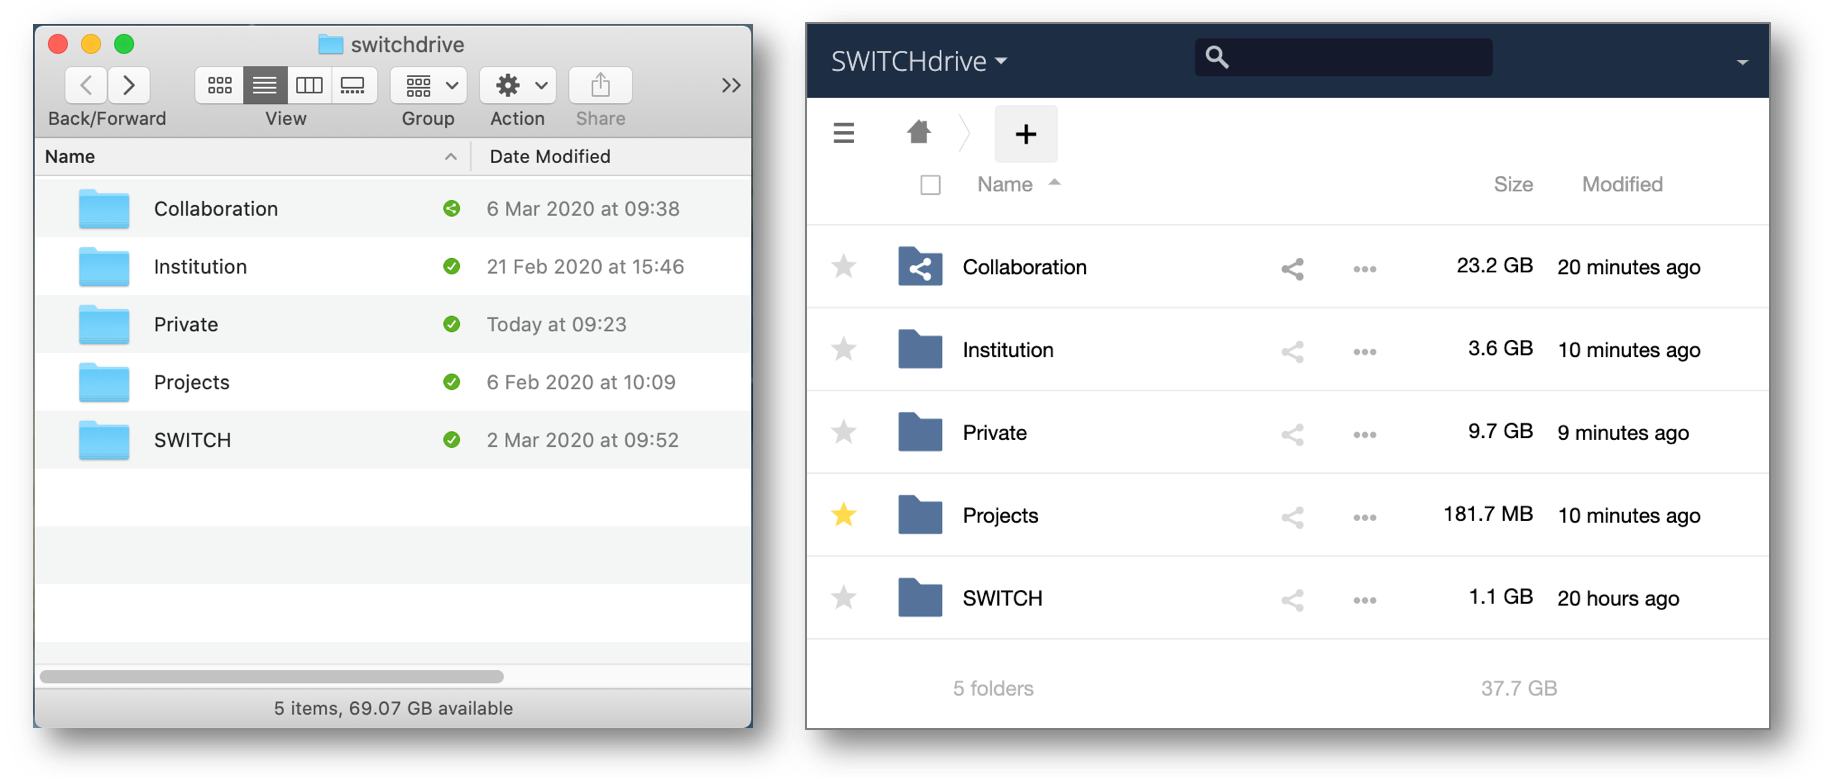
- With the SWITCHdrive Sync-Client (in the picture above on the left), you access your data in a local switchdrive folder. All changes in this folder are mirrored or synchronised to your SWITCHdrive account in the background. Synchronising your changes can take a few seconds up to a few minutes depending on many issues (eg. amount of changes, speed of your internet connection, current load of the switchdrive servers, etc).
- Use the Sync-Client when you want to work as before with your local installed applications, knowing that the Sync-Client will always keep your files synchronised on all attached devices.
- Use the Sync-Client to upload large files which would take too long or fails to upload in the web-client. Because the Sync Client is able to chop large files into smaller chunks, uploads of even very large files are possible this way.
- With the SWITCHdrive Web-Client (in the picture on the right) you access your data in a web browser. All changes to your data are executed immediately and you get instant feedback if everything is fine.
In the SWITCHdrive Web-Client you can also do various actions to your files (e.g. share them with others, rename or delete them). You can also view many files with an integrated file viewer (eg. pdf, jpg, mp4) or even edit some of them with our integrated web office tool (eg. docx, xlsx, pptx). - Use the Web-Client if you do not want to leave any local copy of your data on the computer. If you use a public computer, then you should also close the browser and delete the cache of the browser at the end of the web session.
- Use the SWITCHdrive Web-Client also if you need to restore a file or folder, to see different versions of a file, to create a custom-group, to see the activities of your files or to find out who is the owner of a share or who has shared something with you.
The local switchdrive folder needs to be installed on your harddisk, recommendably inside your home directory.
Do NOT select a network drive or a mobile storage device that is not always available. If the local switchdrive folder cannot be found one day by some technical reason then the SWITCHdrive desktop client may assume that the files were deleted and will move all the files of your SWITCHdrive account into the trashbin.
When you install the SWITCHdrive desktop client, just keep the default settings and the switchdrive folder will automatically be created in the correct location. The SWITCHdrive client installation will also create a shortcut in your FileExplorer (Windows) or in your Finder (MaxOS) for easy access.
Inside the switchdrive folder, it is recommended to use only a few folders - maybe one named "Institution" (1) and another named "Private" (2). You can create more folders by clicking on the "+" icon, for example another folder called "Projects".
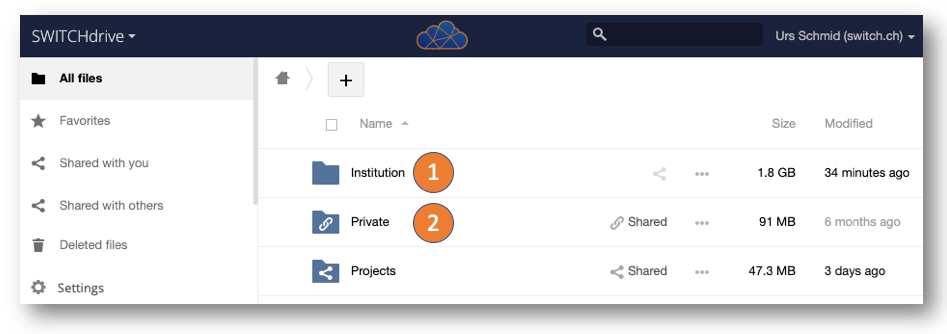
Inside the subfolder "Institution" create more subfolders which you need for your work at your institution. Inside the subfolder "Private" add more subfolders which you want to share with others or to keep stored on SWITCHdrive.
If you will leave your current institution one day this setup will allow you to easily distinguish which data should be transferred to your successor at your institution and which data belongs to you. You can then easily transfer your Private folder to an external harddisk, for example.
Whenever you receive a shared folder, it will pop up in this top level section. Decide if a shared folder belongs to "Private" or rather to "Institution", then move it to the appropriate folder.
Note that you can move a shared folder that you have received to any subfolder inside your switchdrive folder without causing any change to the owner of the folder. You are even allowed to rename a shared folder to some more suitable name without causing a name change at the owner of the shared folder.
The standard quota is 100 GB for the accounts provided by your institution. It is up to your institution to allow you more space. Please refer to this page how to proceed.
Please note:
only your own data is counted to your quota. Shared data that you have received from other users or data that you have deleted is not added to your quota. If you want to see how much quota you have used so far open a web-browser and click on the small triangle (1) to show your personal settings.
In the "General" section (2) you can see a bar indicating how much quota is already used and how much space in your SWITCHdrive account is still available (3).

When you want to add a public link to your SWITCHdrive account, you have to enter https://drive.switch.ch in this form (1) when you click on the public link. You can also click on the download icon (2) to download the file or folder that was shared with you. Check your downloads folder and move the data to your switchdrive folder. This way you can keep the shared data even if the public link becomes invalid one day or was removed by the owner of the public link.
If you want to use the native ownCloud Sync Client you also have to enter the server name https://drive.switch.ch in this form during installation of this app.
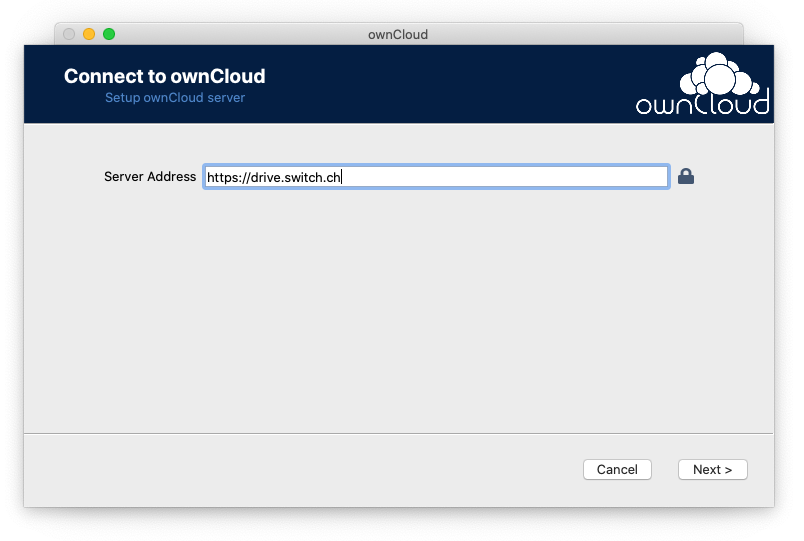
You can download the native ownCloud sync client from the web page of ownCloud, see https://owncloud.com
The use of SWITCHdrive is reserved to members of Swiss institutions which have subscribed to this service of SWITCH. See here a list of institutions that belong to the SWITCHdrive community: https://cloud-id.switch.ch/organizations
Usually, you will be able to continue to use SWITCHdrive for some time after you have left your institution. Sooner or later howerver you will lose your affiliation to your institituiton. If you continue to study or work at another institution that has a subscription to SWITCHdrive, add this new affiliation to your SWITCH edu-ID account. You can then continue to use SWITCHdrive.
If you are not able to add another affiliation to a participating institution you should move all your data to another cloud service or to a backup device. Without a valid affilliation any SWITCHdrive admin could block you at any time from a new login to your SWITCHdrive account. When this happens you will then see such a "User disabled" message:
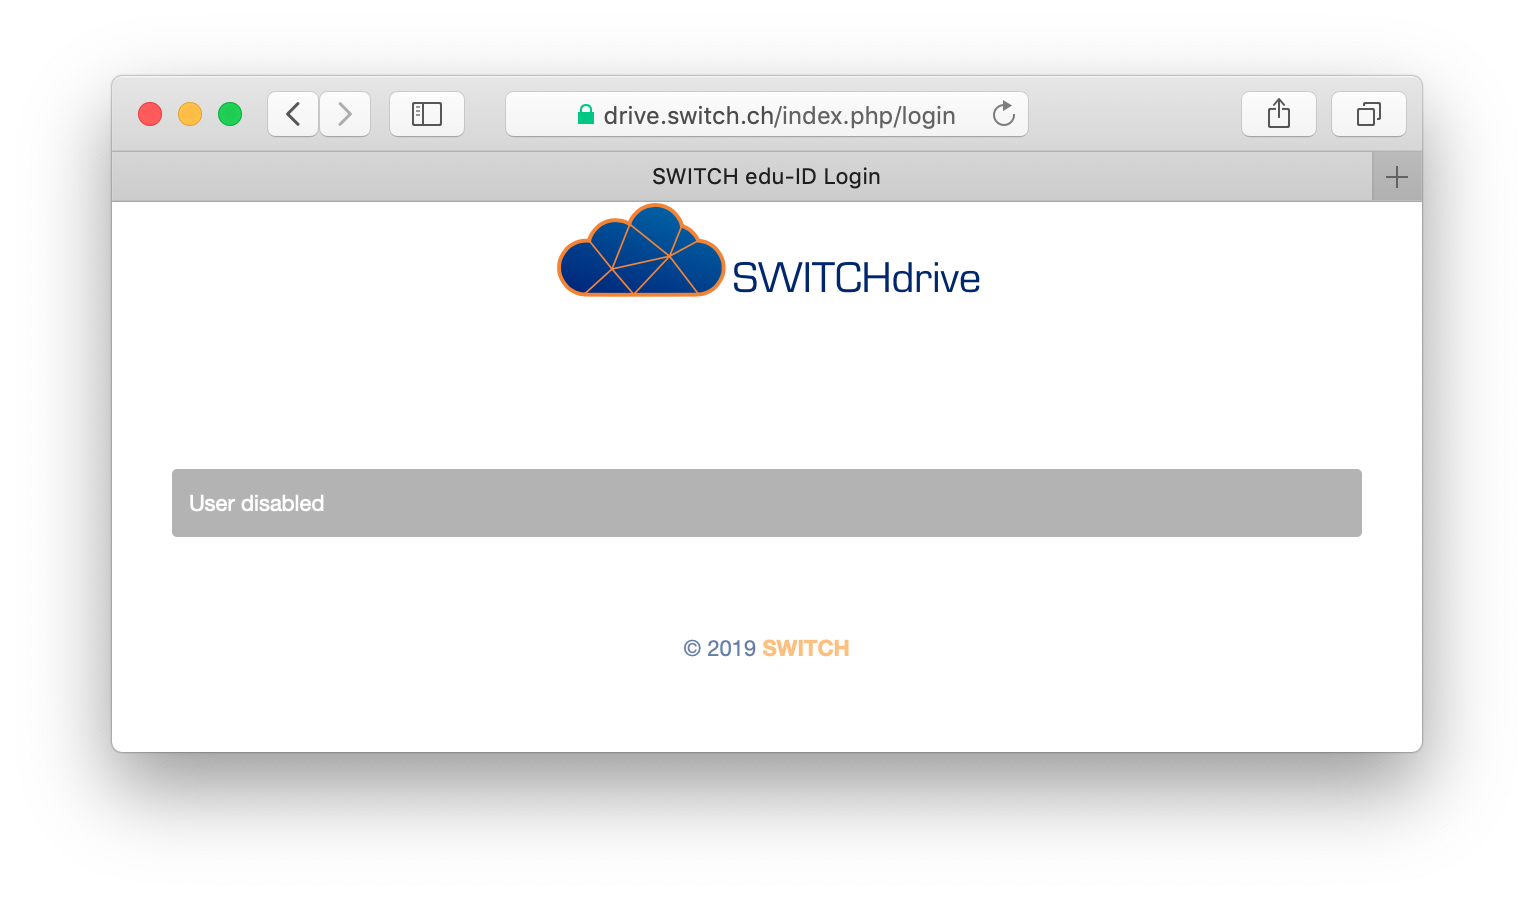 See here what to do then.
If you intend to terminate your SWITCHdrive account, login one last time to your SWTICHdrive account and decline all the shares that you have received from other SWITCHdrive users. Also remove all your shares to other persons. Then log out of SWITCHdrive and simply do not log in again. After a certain time, your SWITCHdrive account will automatically be deactivated because of inactivity.
Yes, but you have to do such file encryption yourself. SWITCHdrive does not encrypt the data that is stored in the SWTICHdrive account. However the data that is transferred from and to the SWITCHdrive servers is encrypted by using SSL (Secure Socket Layer).
Please note that transfer encryption is different from file encryption. File encryption is used to encrypt the data stored on a device, whereas transfer encryption is used to encrypt the communication when transferring data between a client and a server over a network.
If you wish to implement file encryption, please use a 3rd party tool that handles such encryption or activate this feature in your operating system if it supports encryption. You can also selectivly use password protected file encryption, eg. when creating pdfs, office documents or ZIP files.
No, the user is responsible for the backup of his data. Of course we have a system-wide backup where we can restore the whole system in case of disaster but this cannot be claimed for individual restore requests.
Please be aware that the desktop client will always synchronize the content of a local switchdrive folder with the server. This works not only fine for creating or modifying a file, but also for deleting a file. If you delete a file or folder locally, it will also be deleted on the SWITCHdrive server and on other clients.
SWITCHdrive provides a personal trash-bin for your deleted files & folders, see https://drive.switch.ch/index.php/apps/files/?dir=/&view=trashbin
You can restore any deleted item from your trashbin during 90 days (!!) after the item was deleted. When this 3-months-grace-period is over, the file is permanently removed from the servers and cannot be restored any more.
You can login to your Switch Drive account by clicking on the Switch edu-ID button on the left (recommended) or by clicking on the App Passcode button on the right:
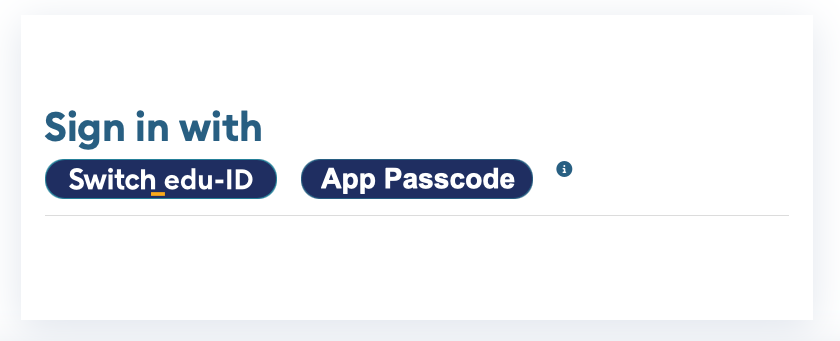
An App Passcode is a password or token which you can create inside your Switch Drive account. See here for more details how to create an App Passcode.
To login to your Switch Drive account via App-Passcode, click on the corresponding button to open the input section. Then enter the email address and the password/token that you have previously created in your Switch Drive Security section:
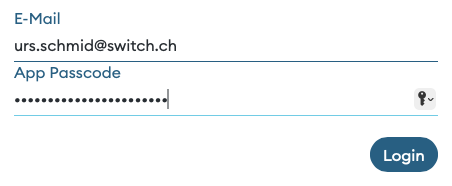
Such App-Passcodes are very handy when you login to your Switch Drive account with a mobile device (e.g. mobile phone, iPad or tablet, but also with a Notebook) and when you access your data via browser only.
When such a mobile device gets lost or stolen, just login to your SwitchDrive account on another computer as quickly as possible and delete the App-Passcode that was created for that mobile device.
By doing so, the data connection between the mobile device and the Switch Drive account is immediately closed and the finder of the mobile device is unable to access your data via Web-Browser even if the mobile device gets unlocked.
Note: the App-Passcode is NOT your Switch edu-ID password! You can create as many App-Passcodes as you need and also delete them when the become obsolete, e.g. when you change your mobile device. We recommend to create a unique App-Passcode for each mobile device and not to use the same App-Passcode on multiple devices.