Uploading an Image
You will need a boot medium from which your virtual machine boots. This is called an image. We already have provisioned a number of ready made images that you can use, but you can of course add your own images.
Create an Image
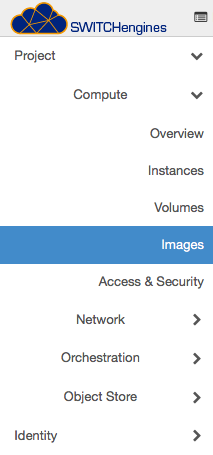
To do this, select the Images tab in the user interface

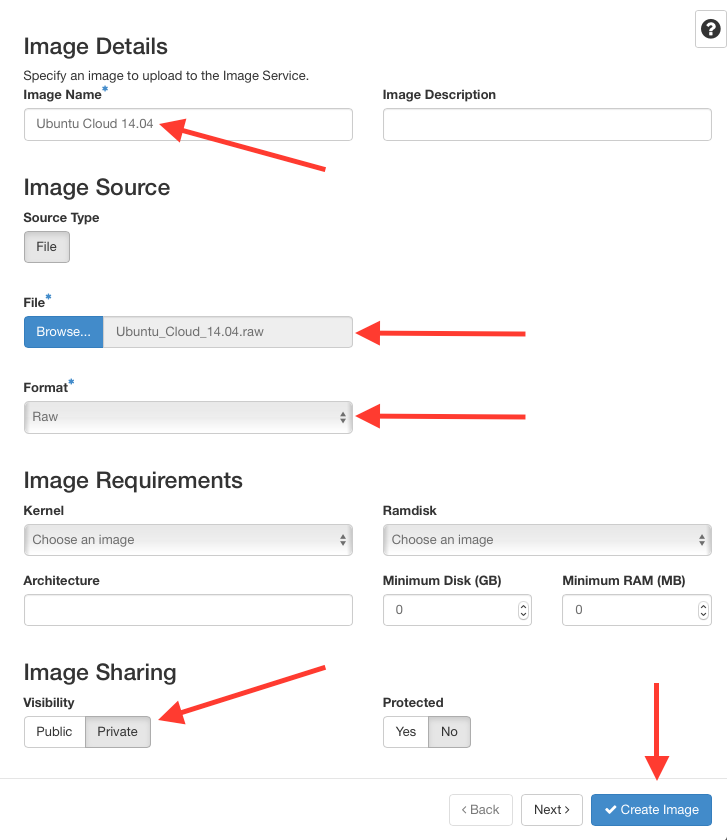
and click on Create Image. You will be presented with the following dialog:

Enter a Name for the image (for example "Ubuntu Cloud 14.04")
Optionally add a Description.
Select the image File you want to upload.
Select the Format. We strongly recommend you use RAW images and that the images you use are using are using Cloud Init (Ubuntu Cloud-Init, Redhat Cloud-Init). Using QCOW2 images will work (but our system is optimized for RAW images and will be able to spawn instances from RAW images much faster than from QCOW2 images). ISO images (Installation CD Roms) generally don't work!
You will then specify the minimum size of the boot disk in GigaBytes and the amount of Minimum RAM. These settings control what size a virtual machine needs to boot from this image.
By selecting Public you make this image available to other all other users and projects. In general, you should NOT create public images.
By selecting Protected you prevent this image from being deletable.
After clicking on Create Image the upload will take place, the image will be imported and will be ready after a few minutes (depending on the size)
Uploading an Image Using CLI
You can use the OpenStack CLI to upload a new image into your project:
openstack image create --file [RAW_IMAGE_FILE] --private \
          --disk-format raw --container-format bare [IMAGE_NAME]