Configuring your Network
First, the good news: SWITCHengines allows you to configure your own network topology for use in your VMs. The bad news however, is that you will need to do some initial configuration to have a secure and working network environment. Luckily, this process only needs to be done once.
In the user interface, you will see the Network options:
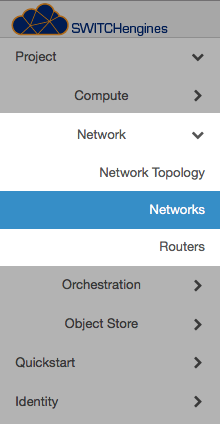
Click on it and you the following screen will be displayed. Here you can create, set, and delete Networks, Subnets, and Gateway IPs.

Configuring Network
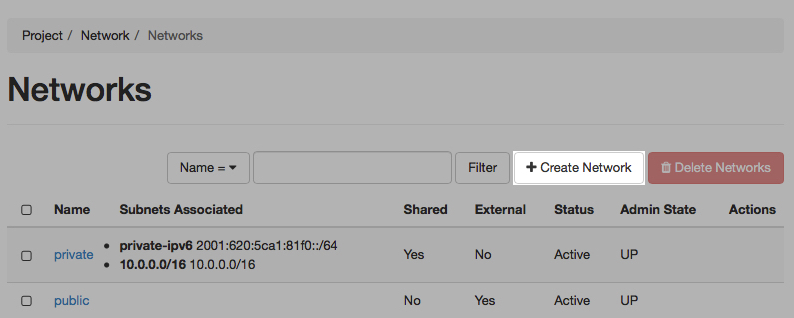
In order to create a new network you must click on the "+ Create Network" and enter a name for your new network. The name itself is arbitrary and only used so that you will have an overview of the multiple networks you created.
Enter a name in the Network Name field, and leave the "Create Subnet" checkbox checked (default). Then click the Next button.

The name of the subnet can be anything. Enter a Network Address in CIDR form (x.y.z.w/n). If you are unsure what to use, then use the suggested 192.168.0.0/24 which will create a network with 254 adresses from 192.168.0.1 to 192.168.0.253. Your virtual machines will automatically receive an IP address from this network. Leave the other fields blank, then click on Next.

On this page, you can insert default DNS-Servers and the rest you may leave as shown above; then click on Create. Your network now shows up in the list of networks.

Next, we will need to configure a router.
Creating a Router
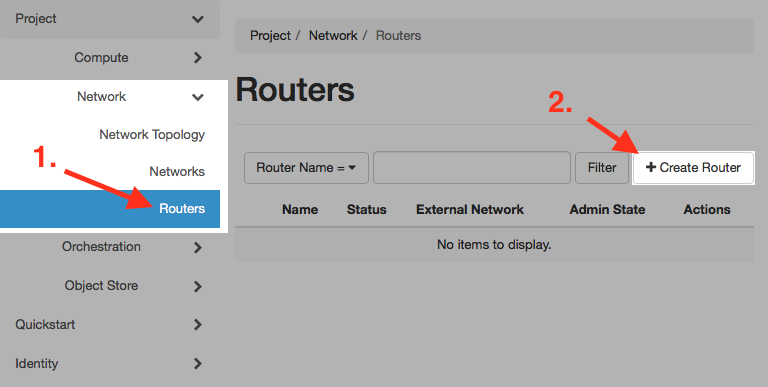
1. Click on the Routers tab (Network> Routers) and then 2. click on the Create Router button on the right.
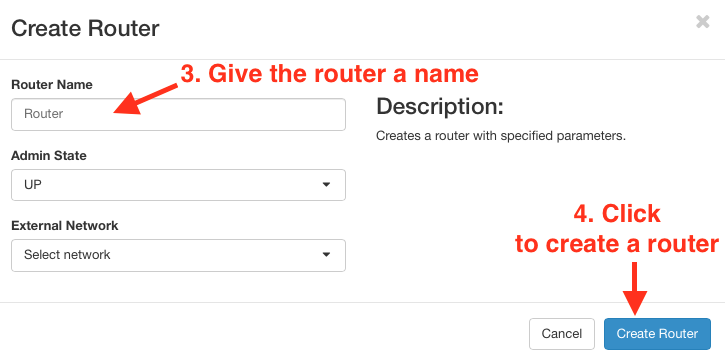
1. Give it a name (again arbitrary) and then 2. click on "Create Router" to save it.
You will see the router that you just created listed.
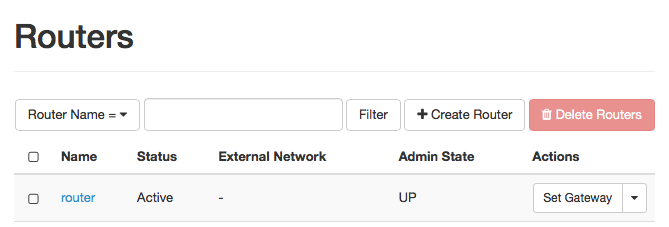
Set a Gateway
Next click on Set Gateway on your Router...
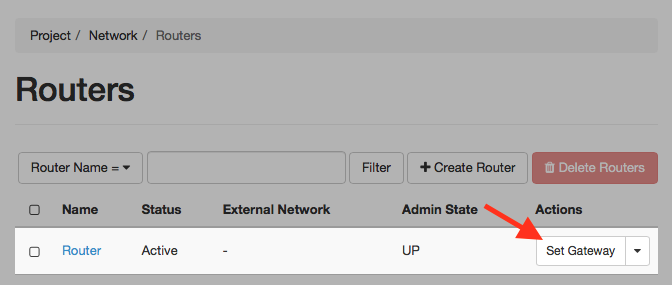
And you will get the following dialog:
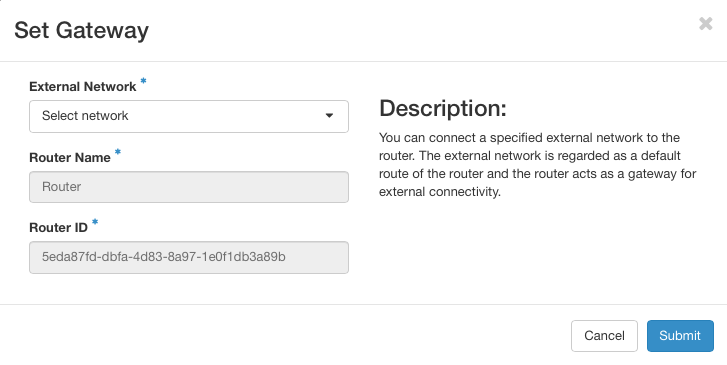
First, click on Select network.
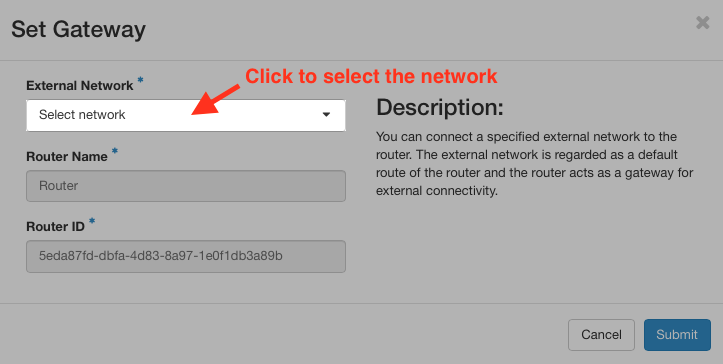
Next 1. choose public in the External Network dropdown menu and then 2. click on Submit.
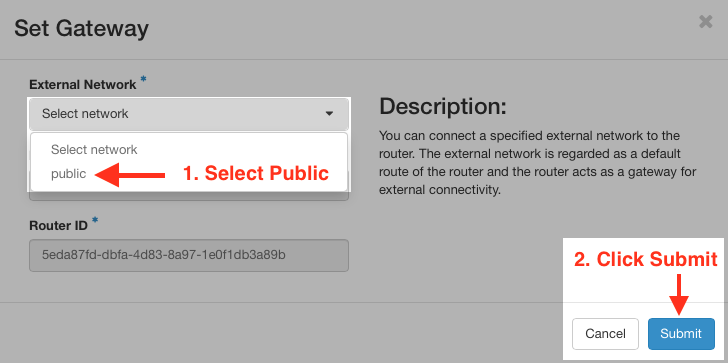
After clicking on Submit you will have enabled the router to route packets to the outside world.
Add an Interface
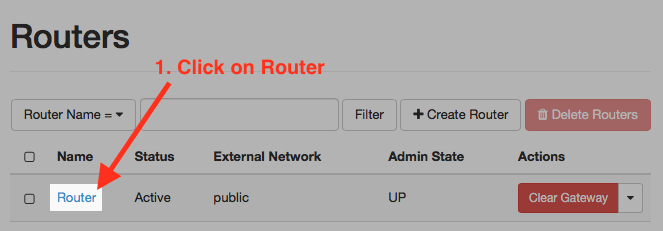
Now 1. click on the router.
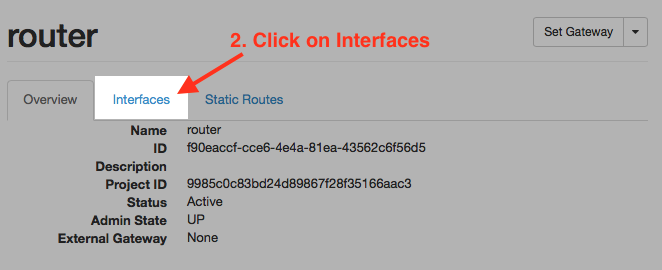
and 2. click on Interfaces
and then 3. add an Interface by clicking on "+Add Interface"
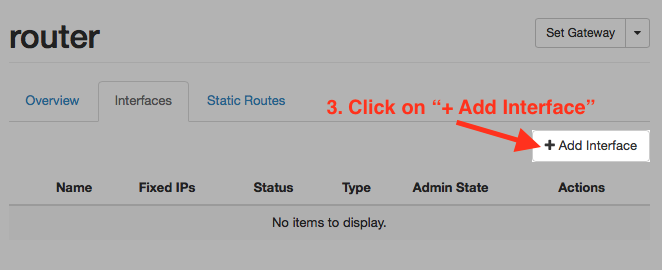
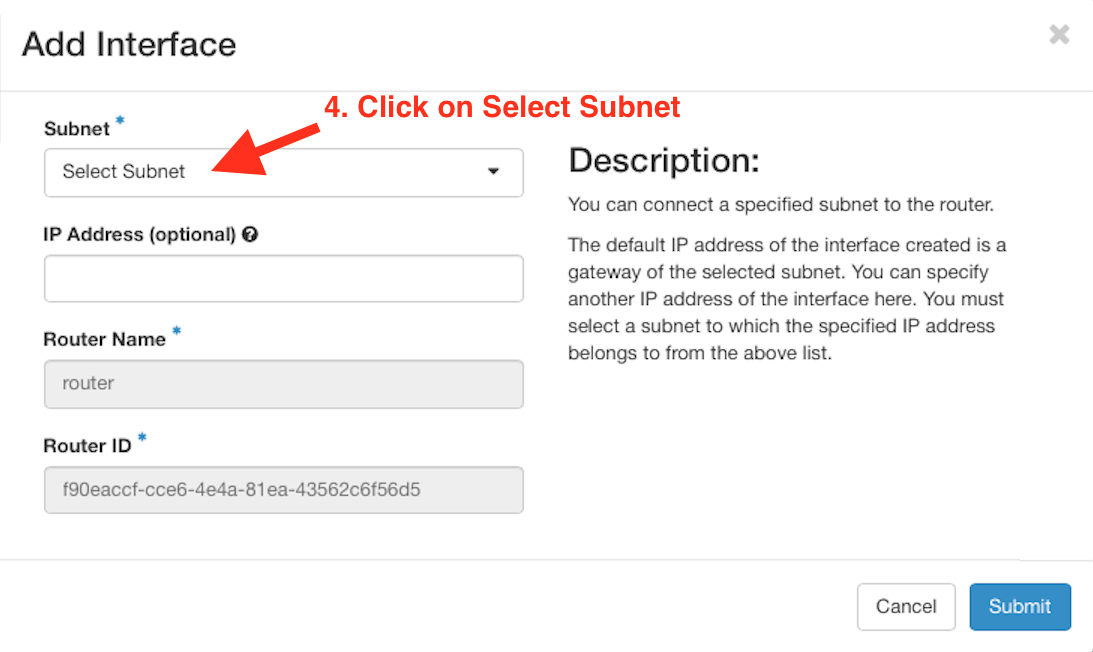
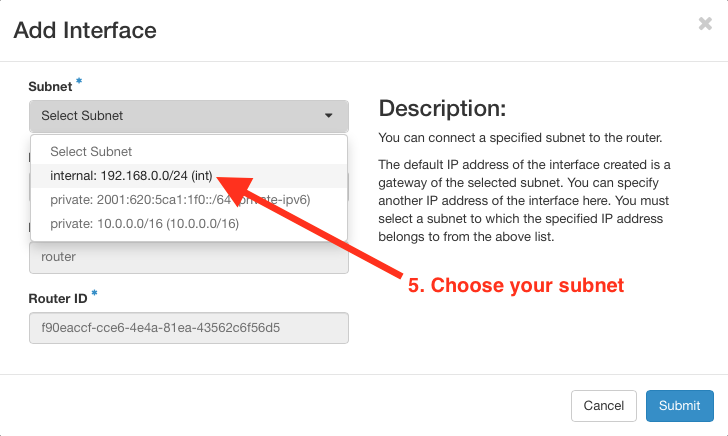
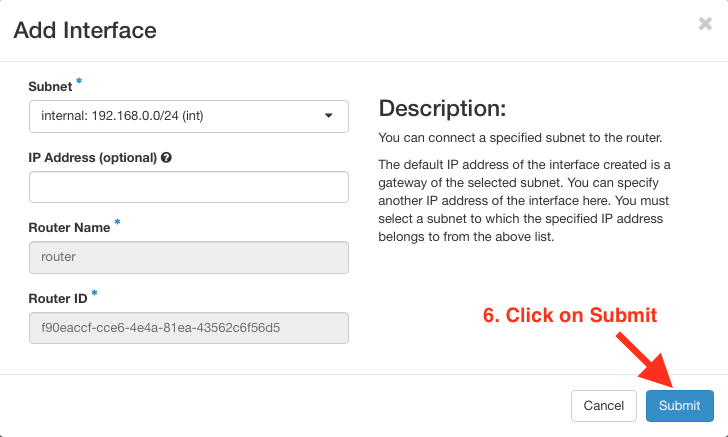
Your network is now configured and you can launch virtual machines on this new network.
Complex configurations
You can of course create more complex network topologies, but we assume that you know enough about networks such that you are able to configure same on your own.