SWITCHengines VPC User Documentation
Starting instances in SWITCHengines attached to a VPC network is exactly the same as starting them with the standard networking setup. However SWITCH has to setup for you the VPC project network in advance.
Browse to
https://engines.switch.ch/horizon/project/networks/
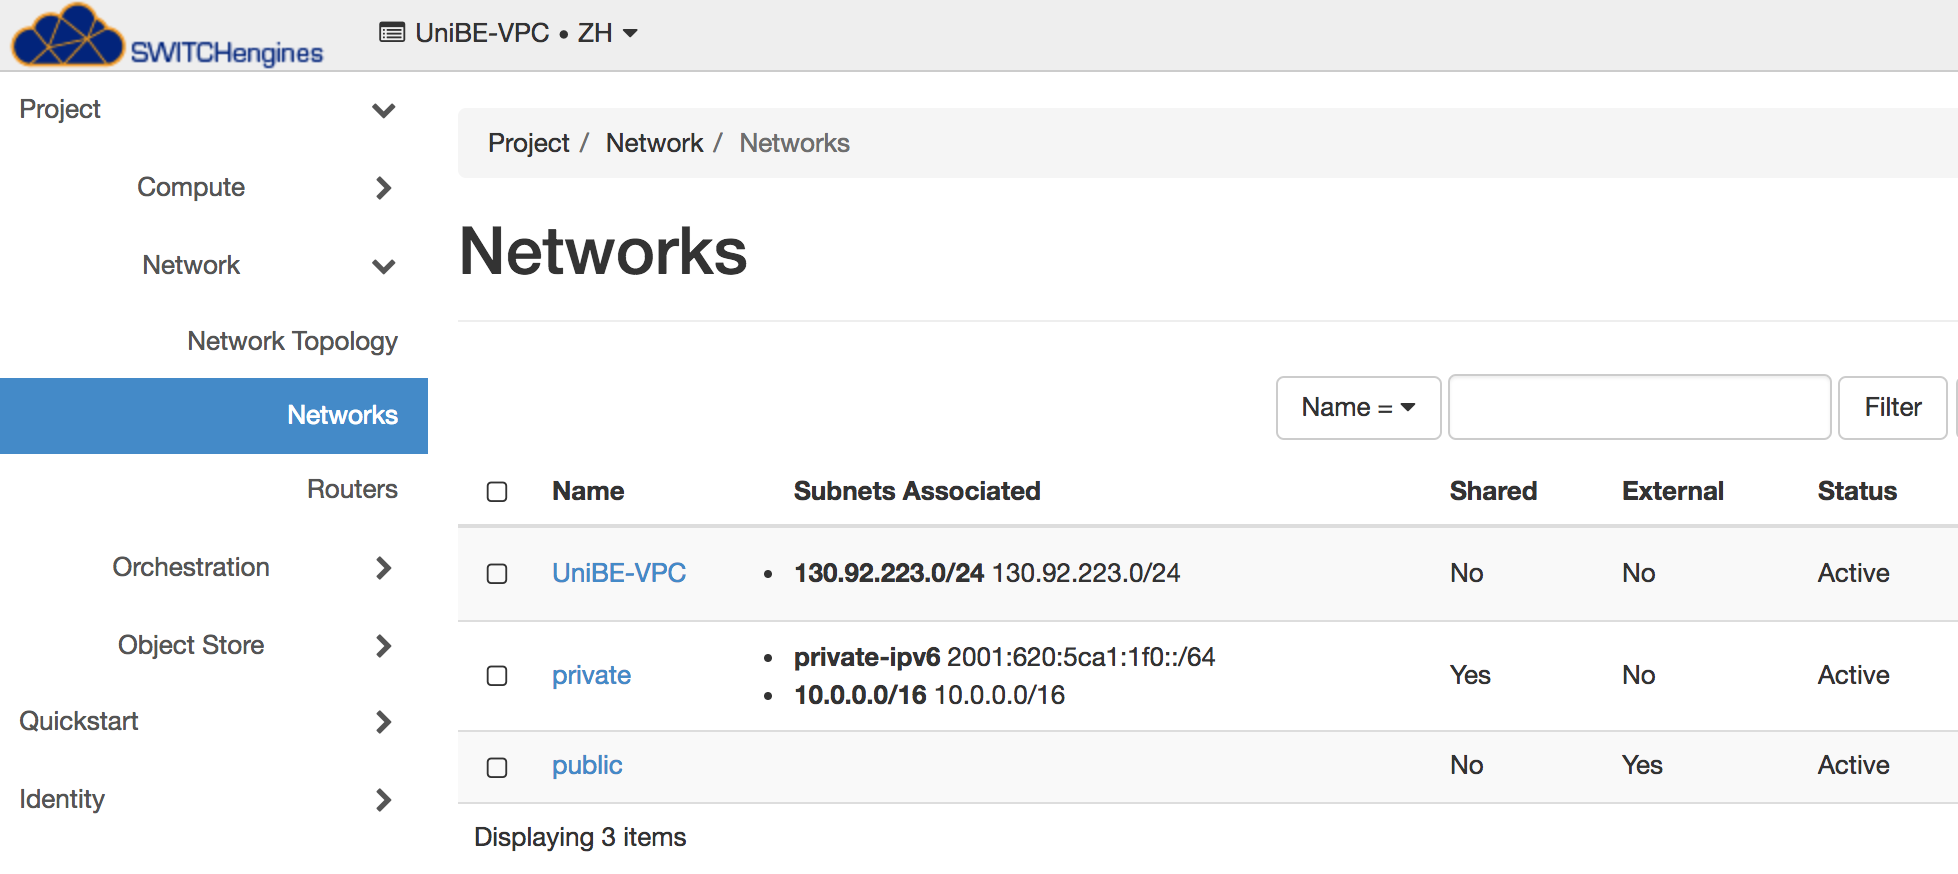
and identify your VPC network. In the example screenshot it is UniBE-VPC
To start a virtual machine with the network interface in the VPC network you can NOT use the quickstart UI. Browse to instanced tab to and click on Launch Instance.
https://engines.switch.ch/horizon/project/instances/
The procedure to start a virtual machine is exactly the same as the one without VPC. You can check the documentation page:
https://help.switch.ch/engines/documentation/start-virtual-machines/
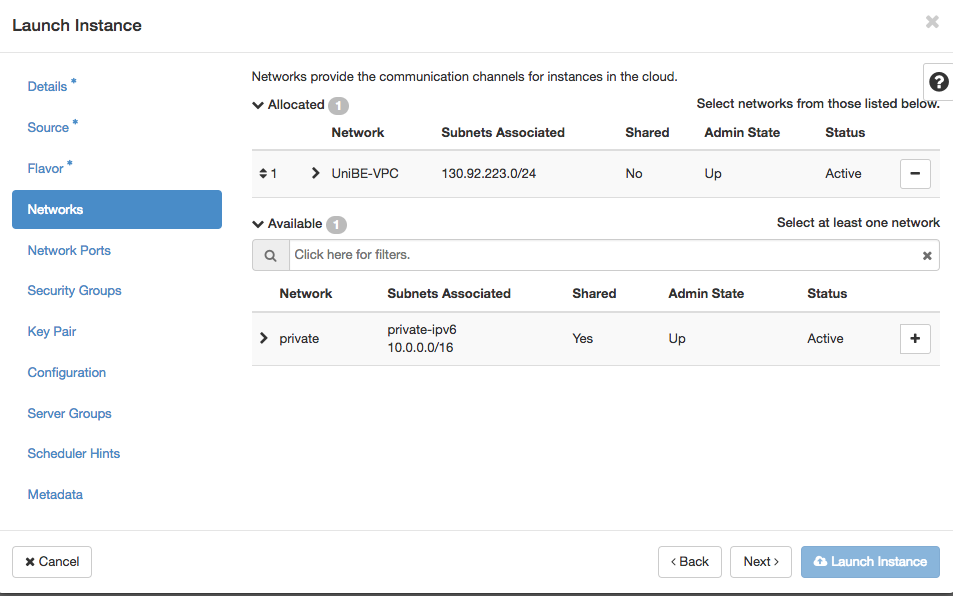
When you are on the network menu, select the VPC network.
Assign a Static IP via DHCP
It is possible to create network ports in advance with a fixed IP addresses, and attach the ports to the instances at boot or at a later time.
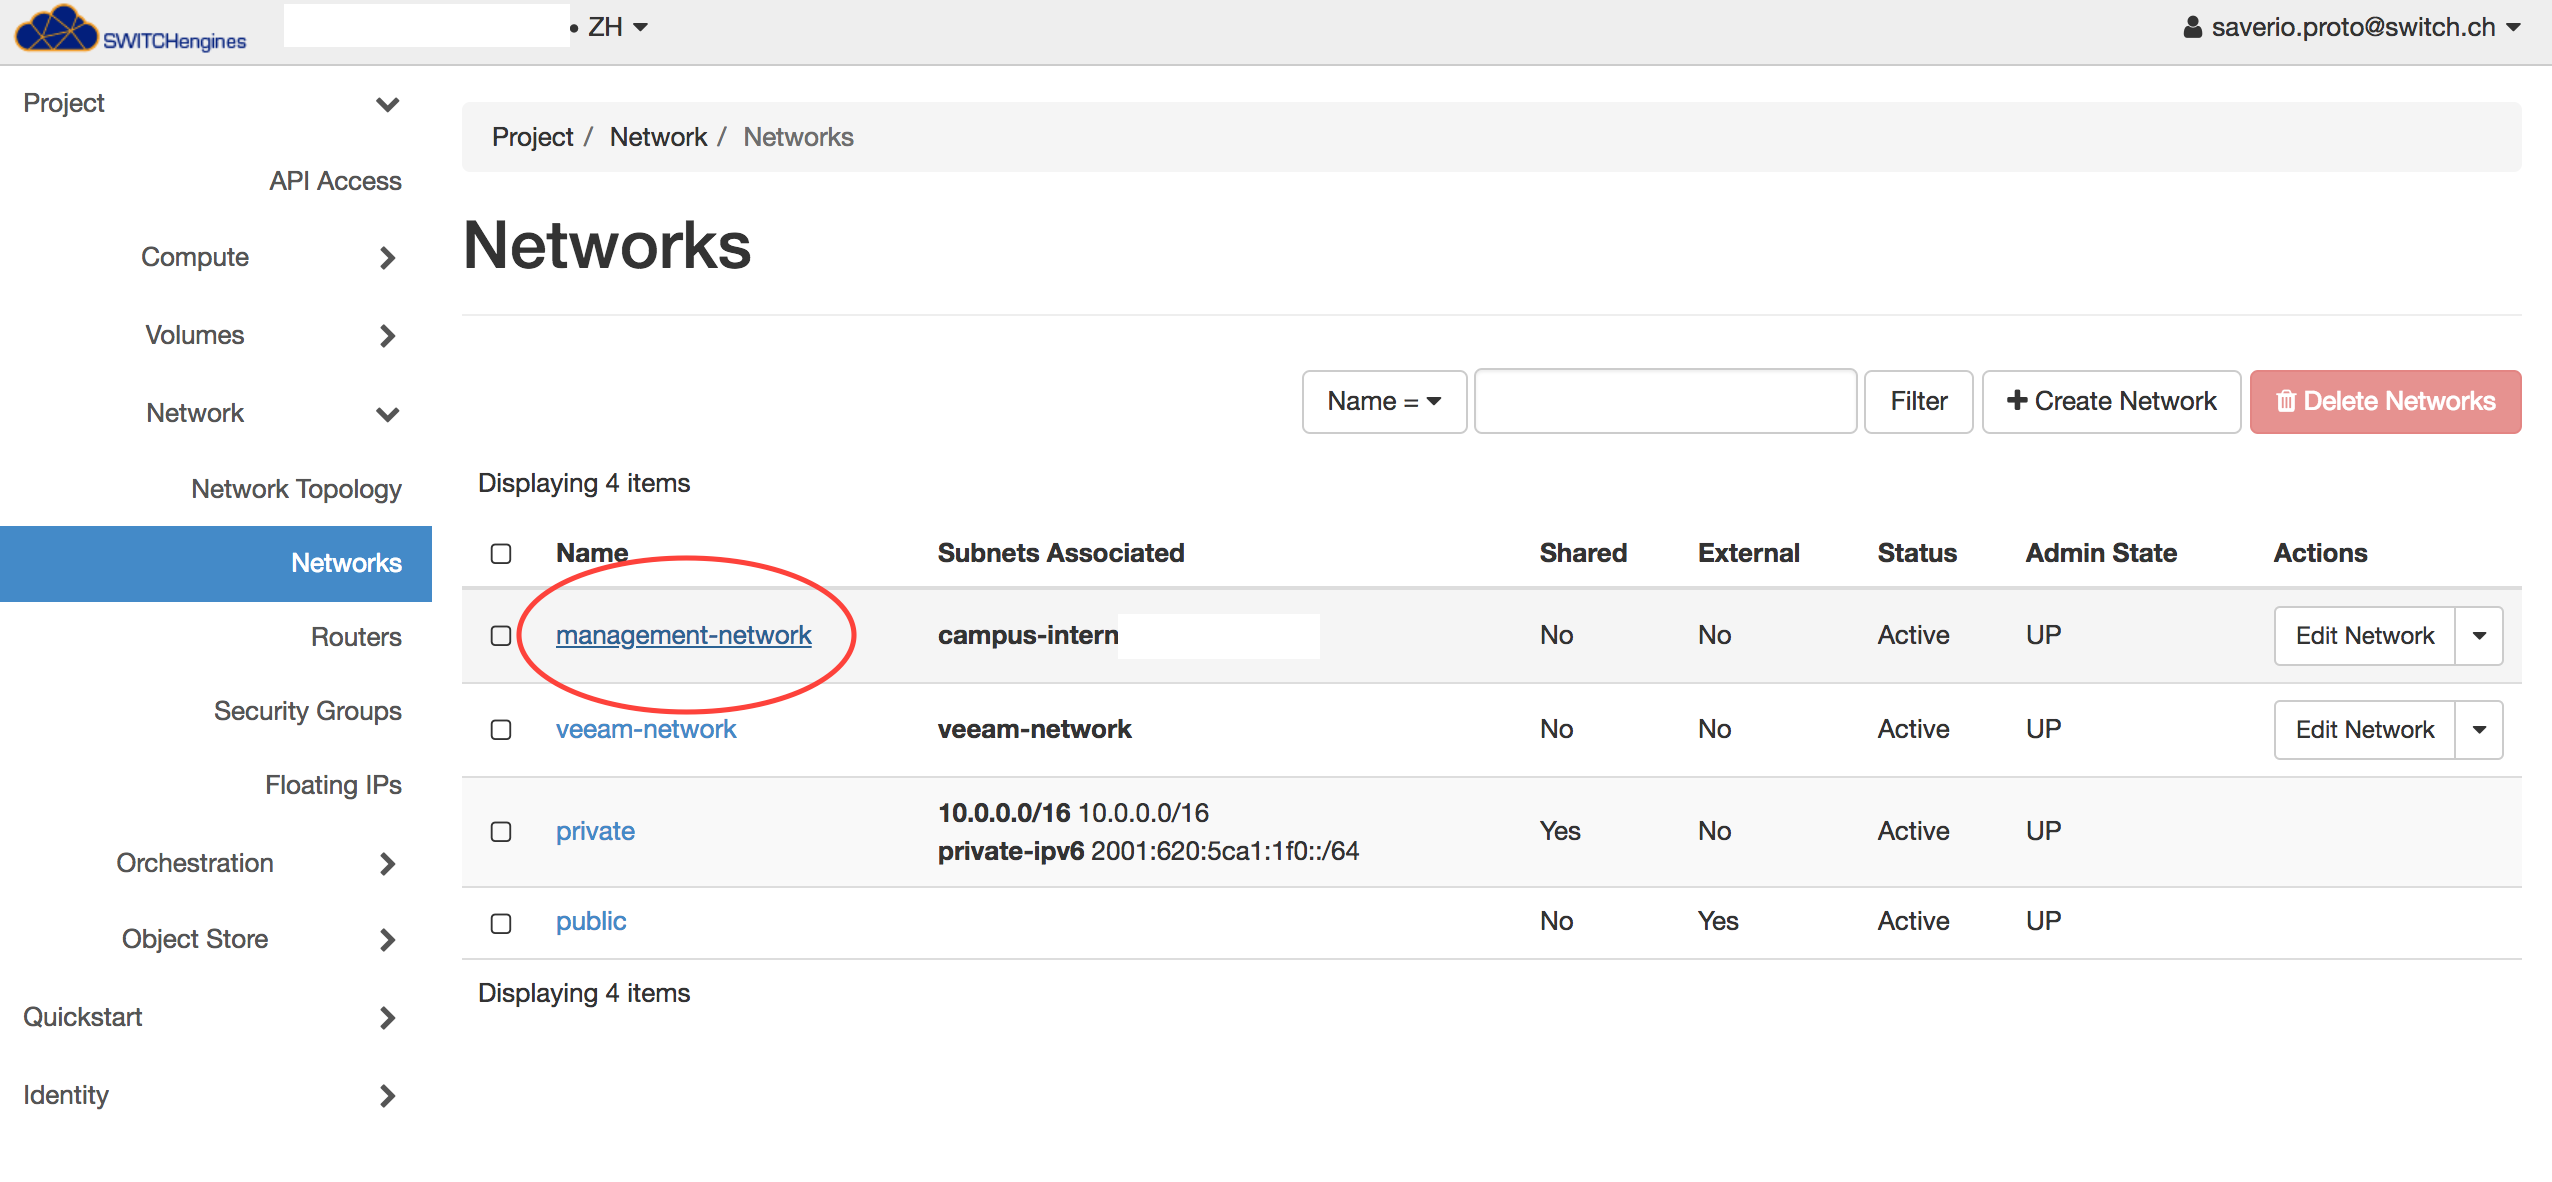
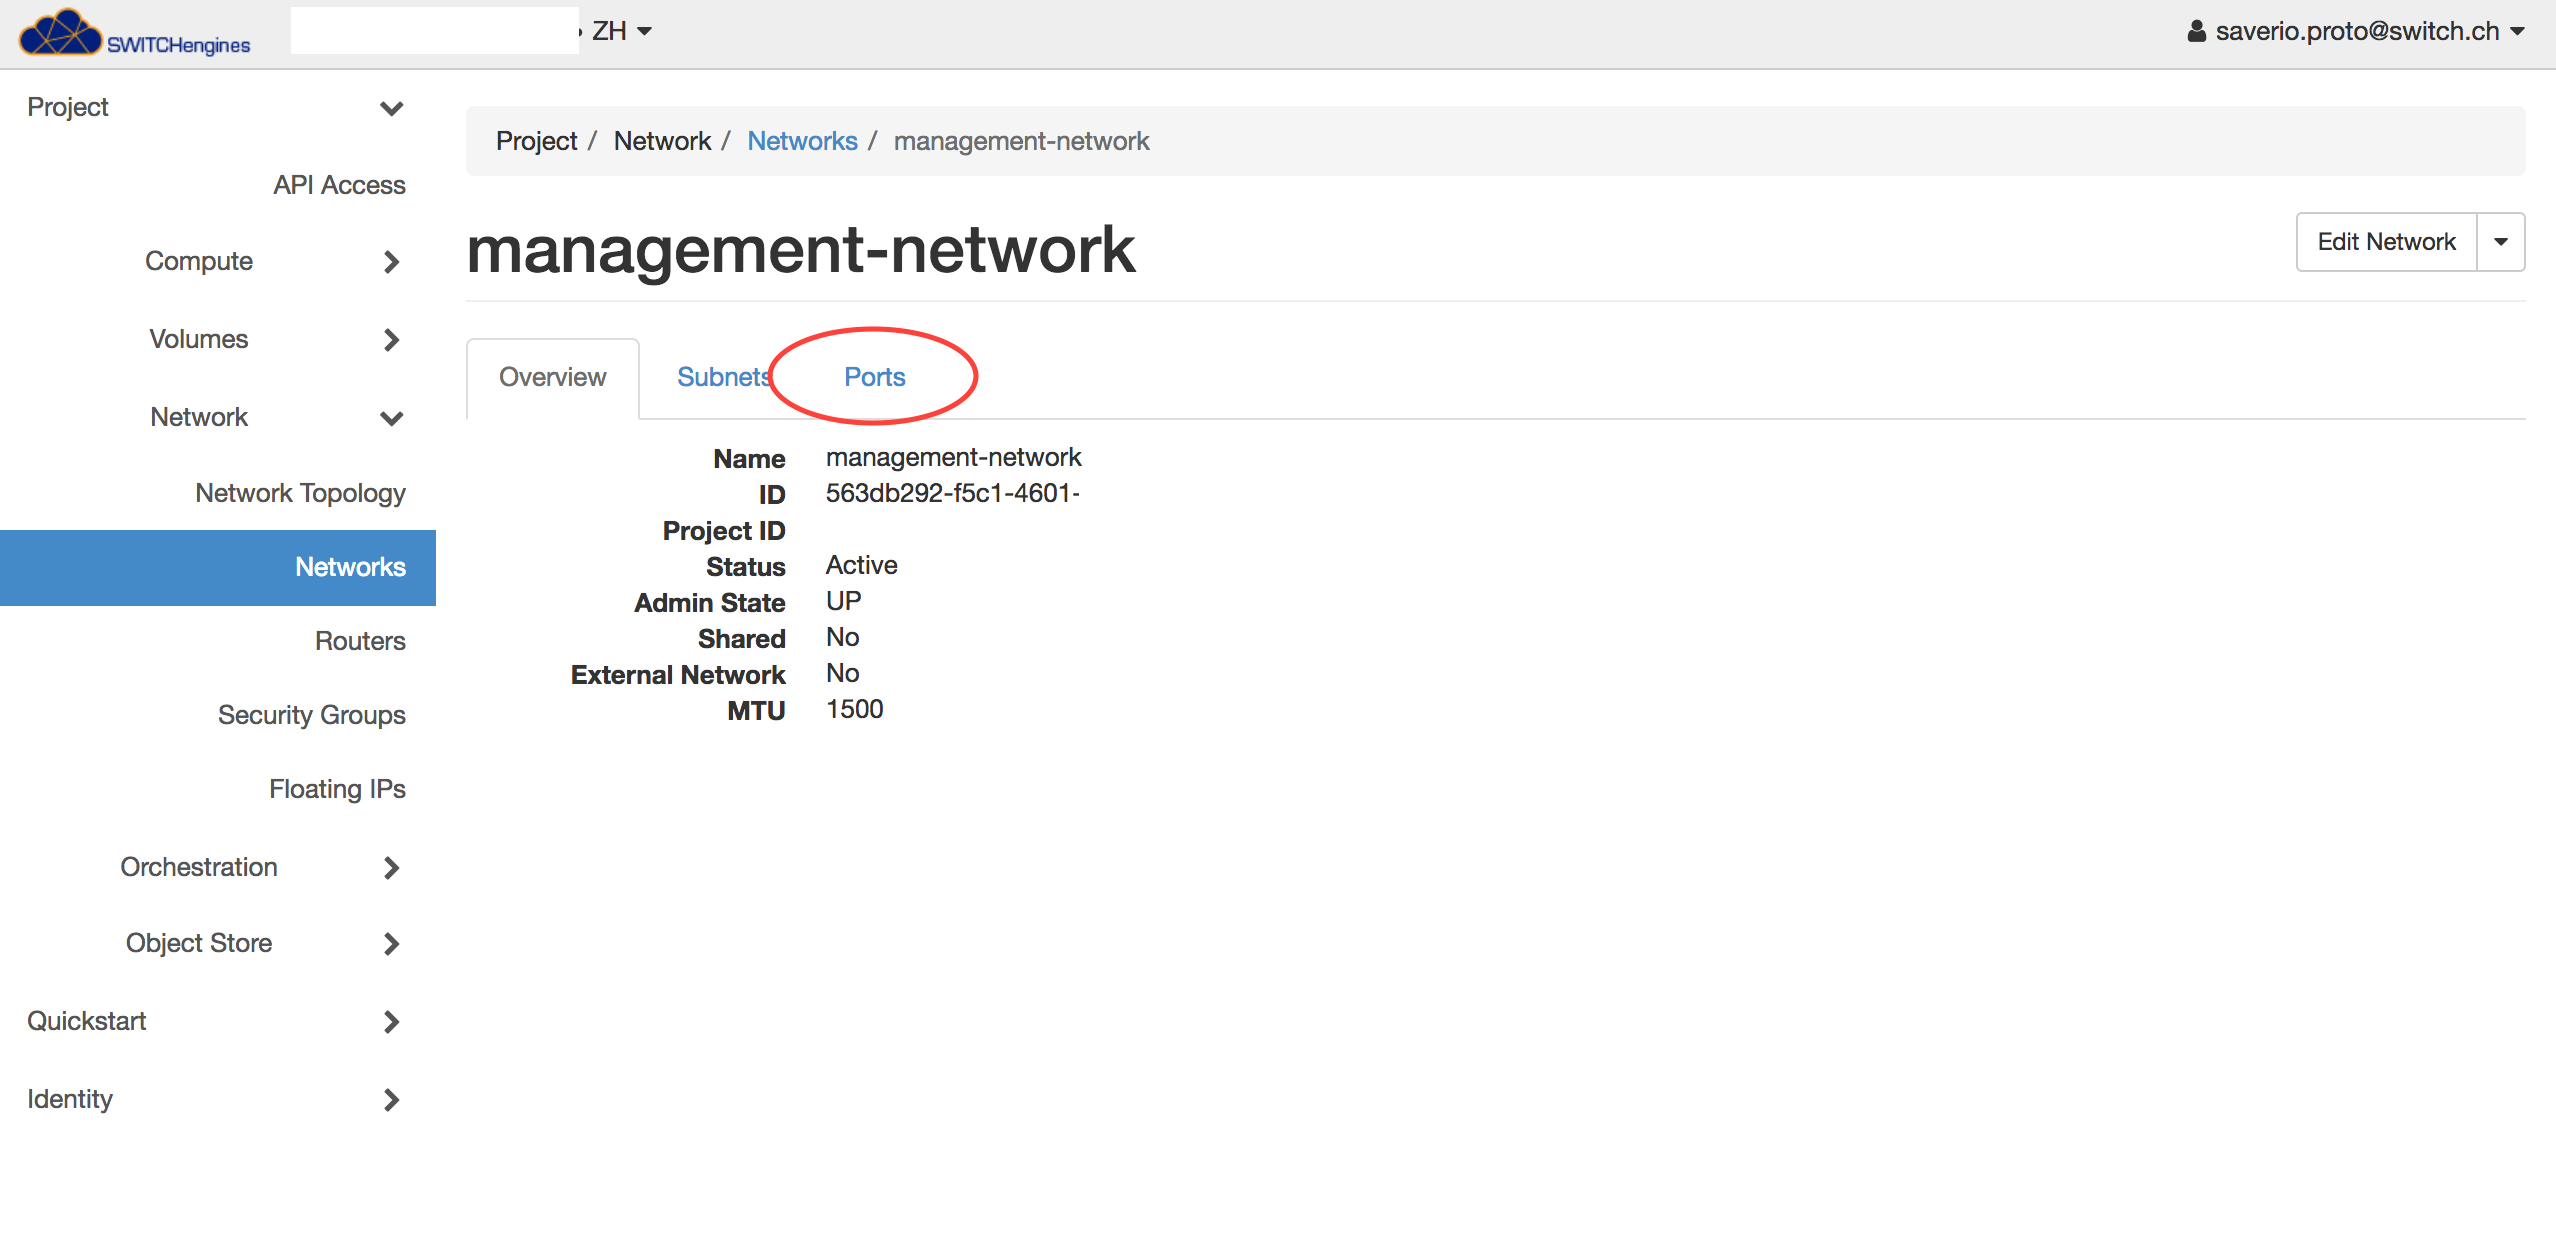
The first step is to click on the Network name we want to use:
Select the "Ports" tab:
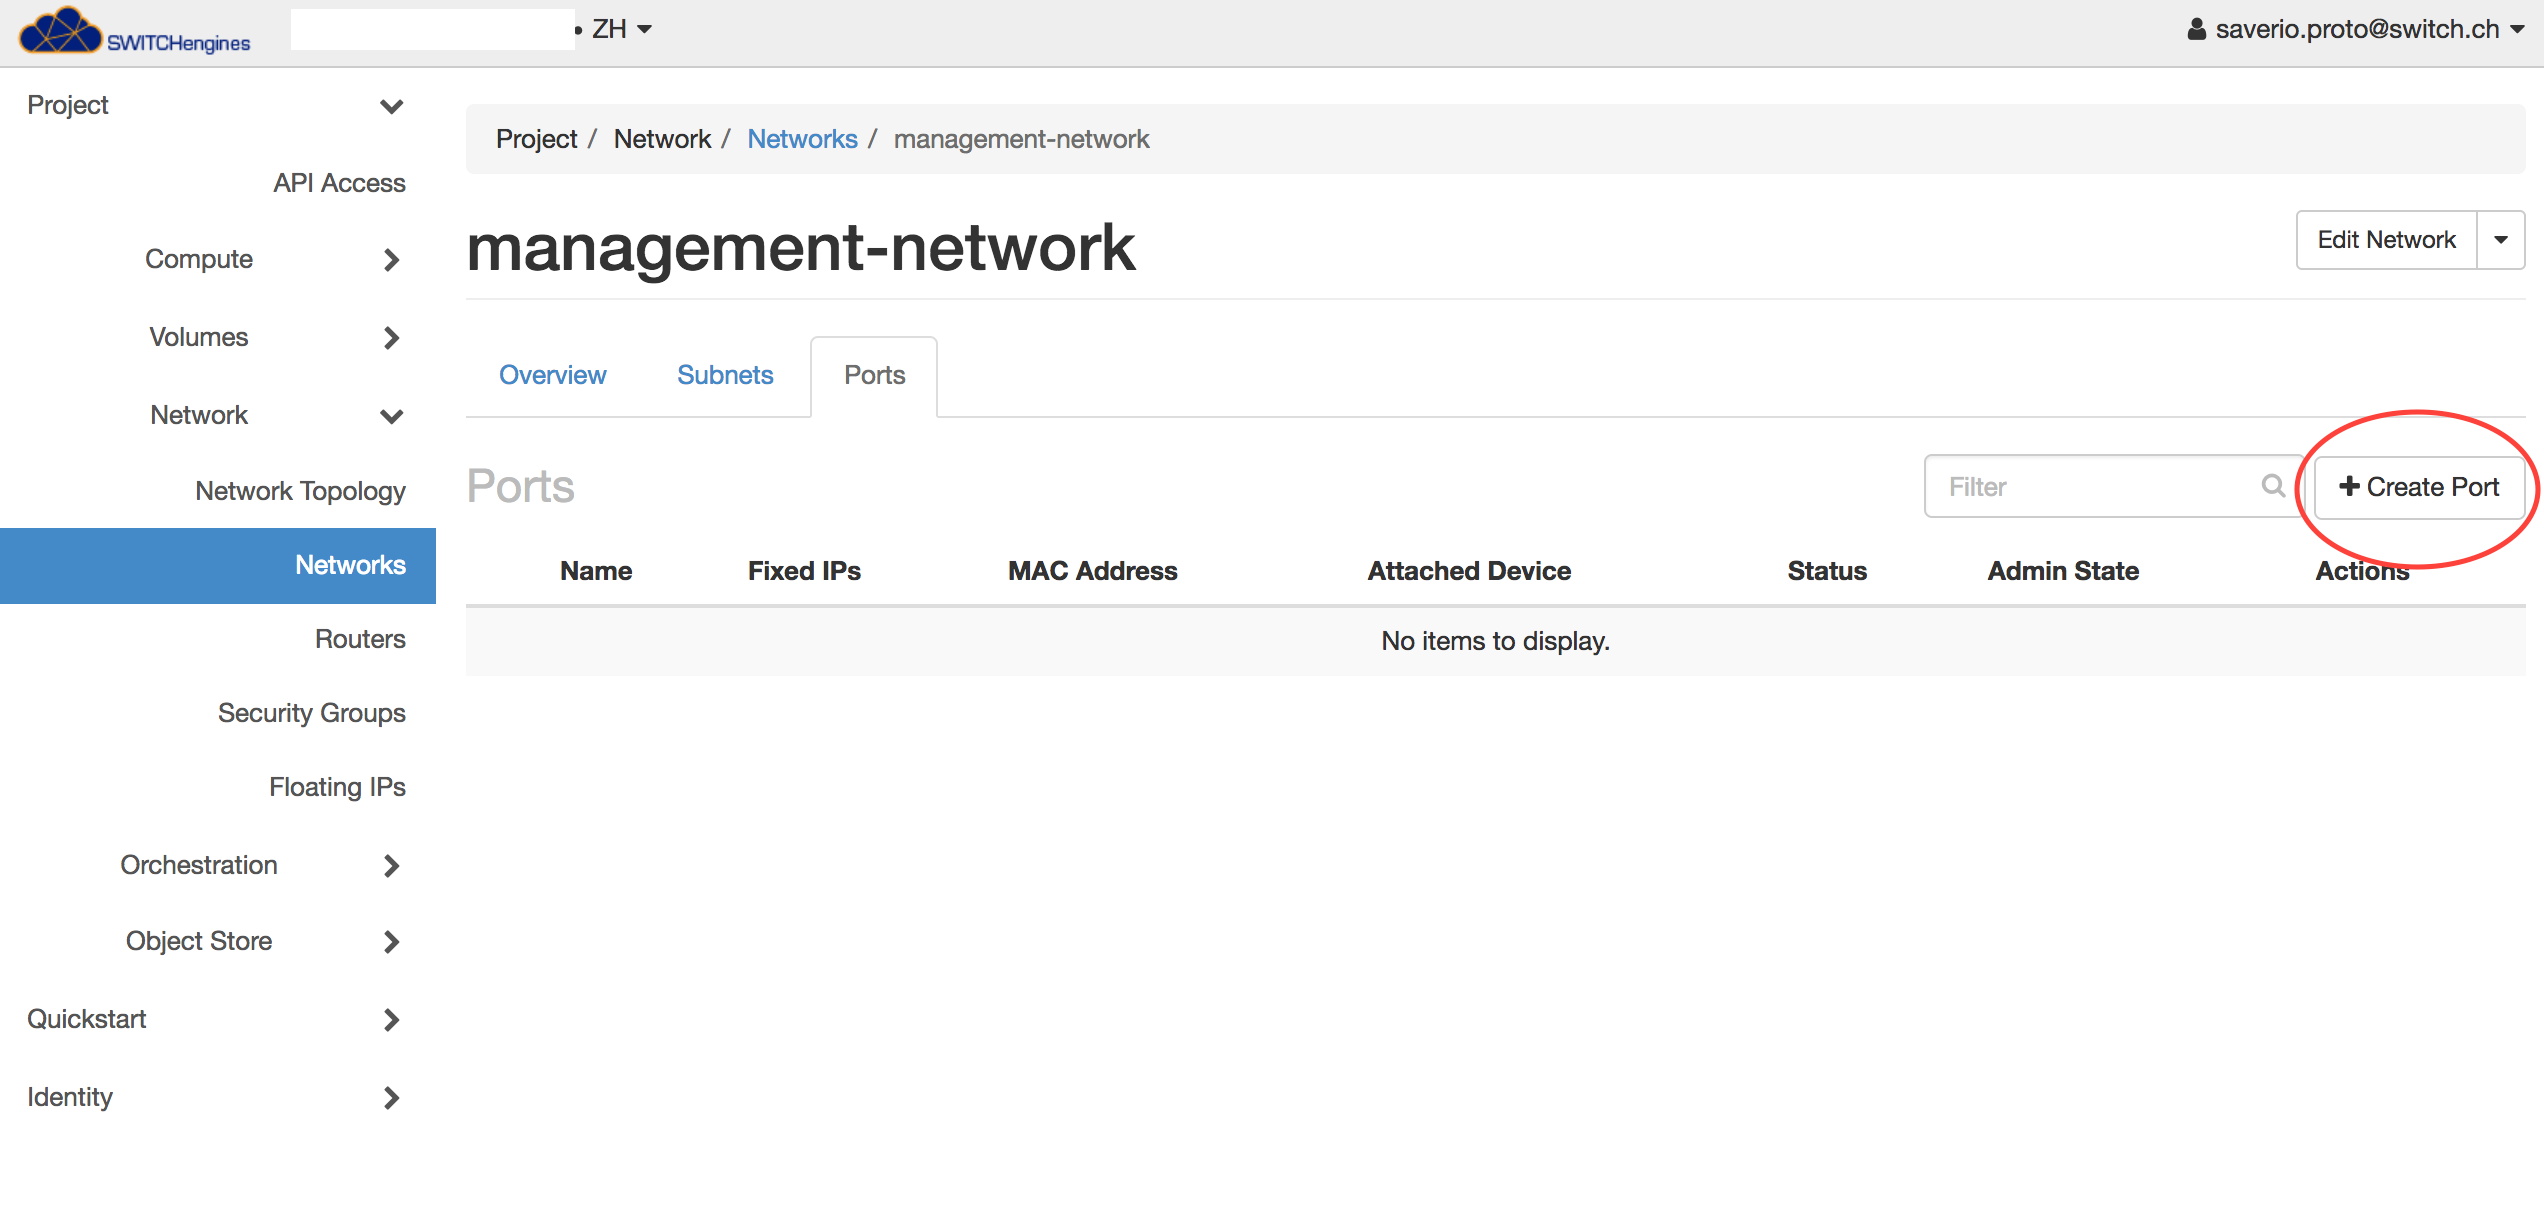
Now you can click on "Create Port":
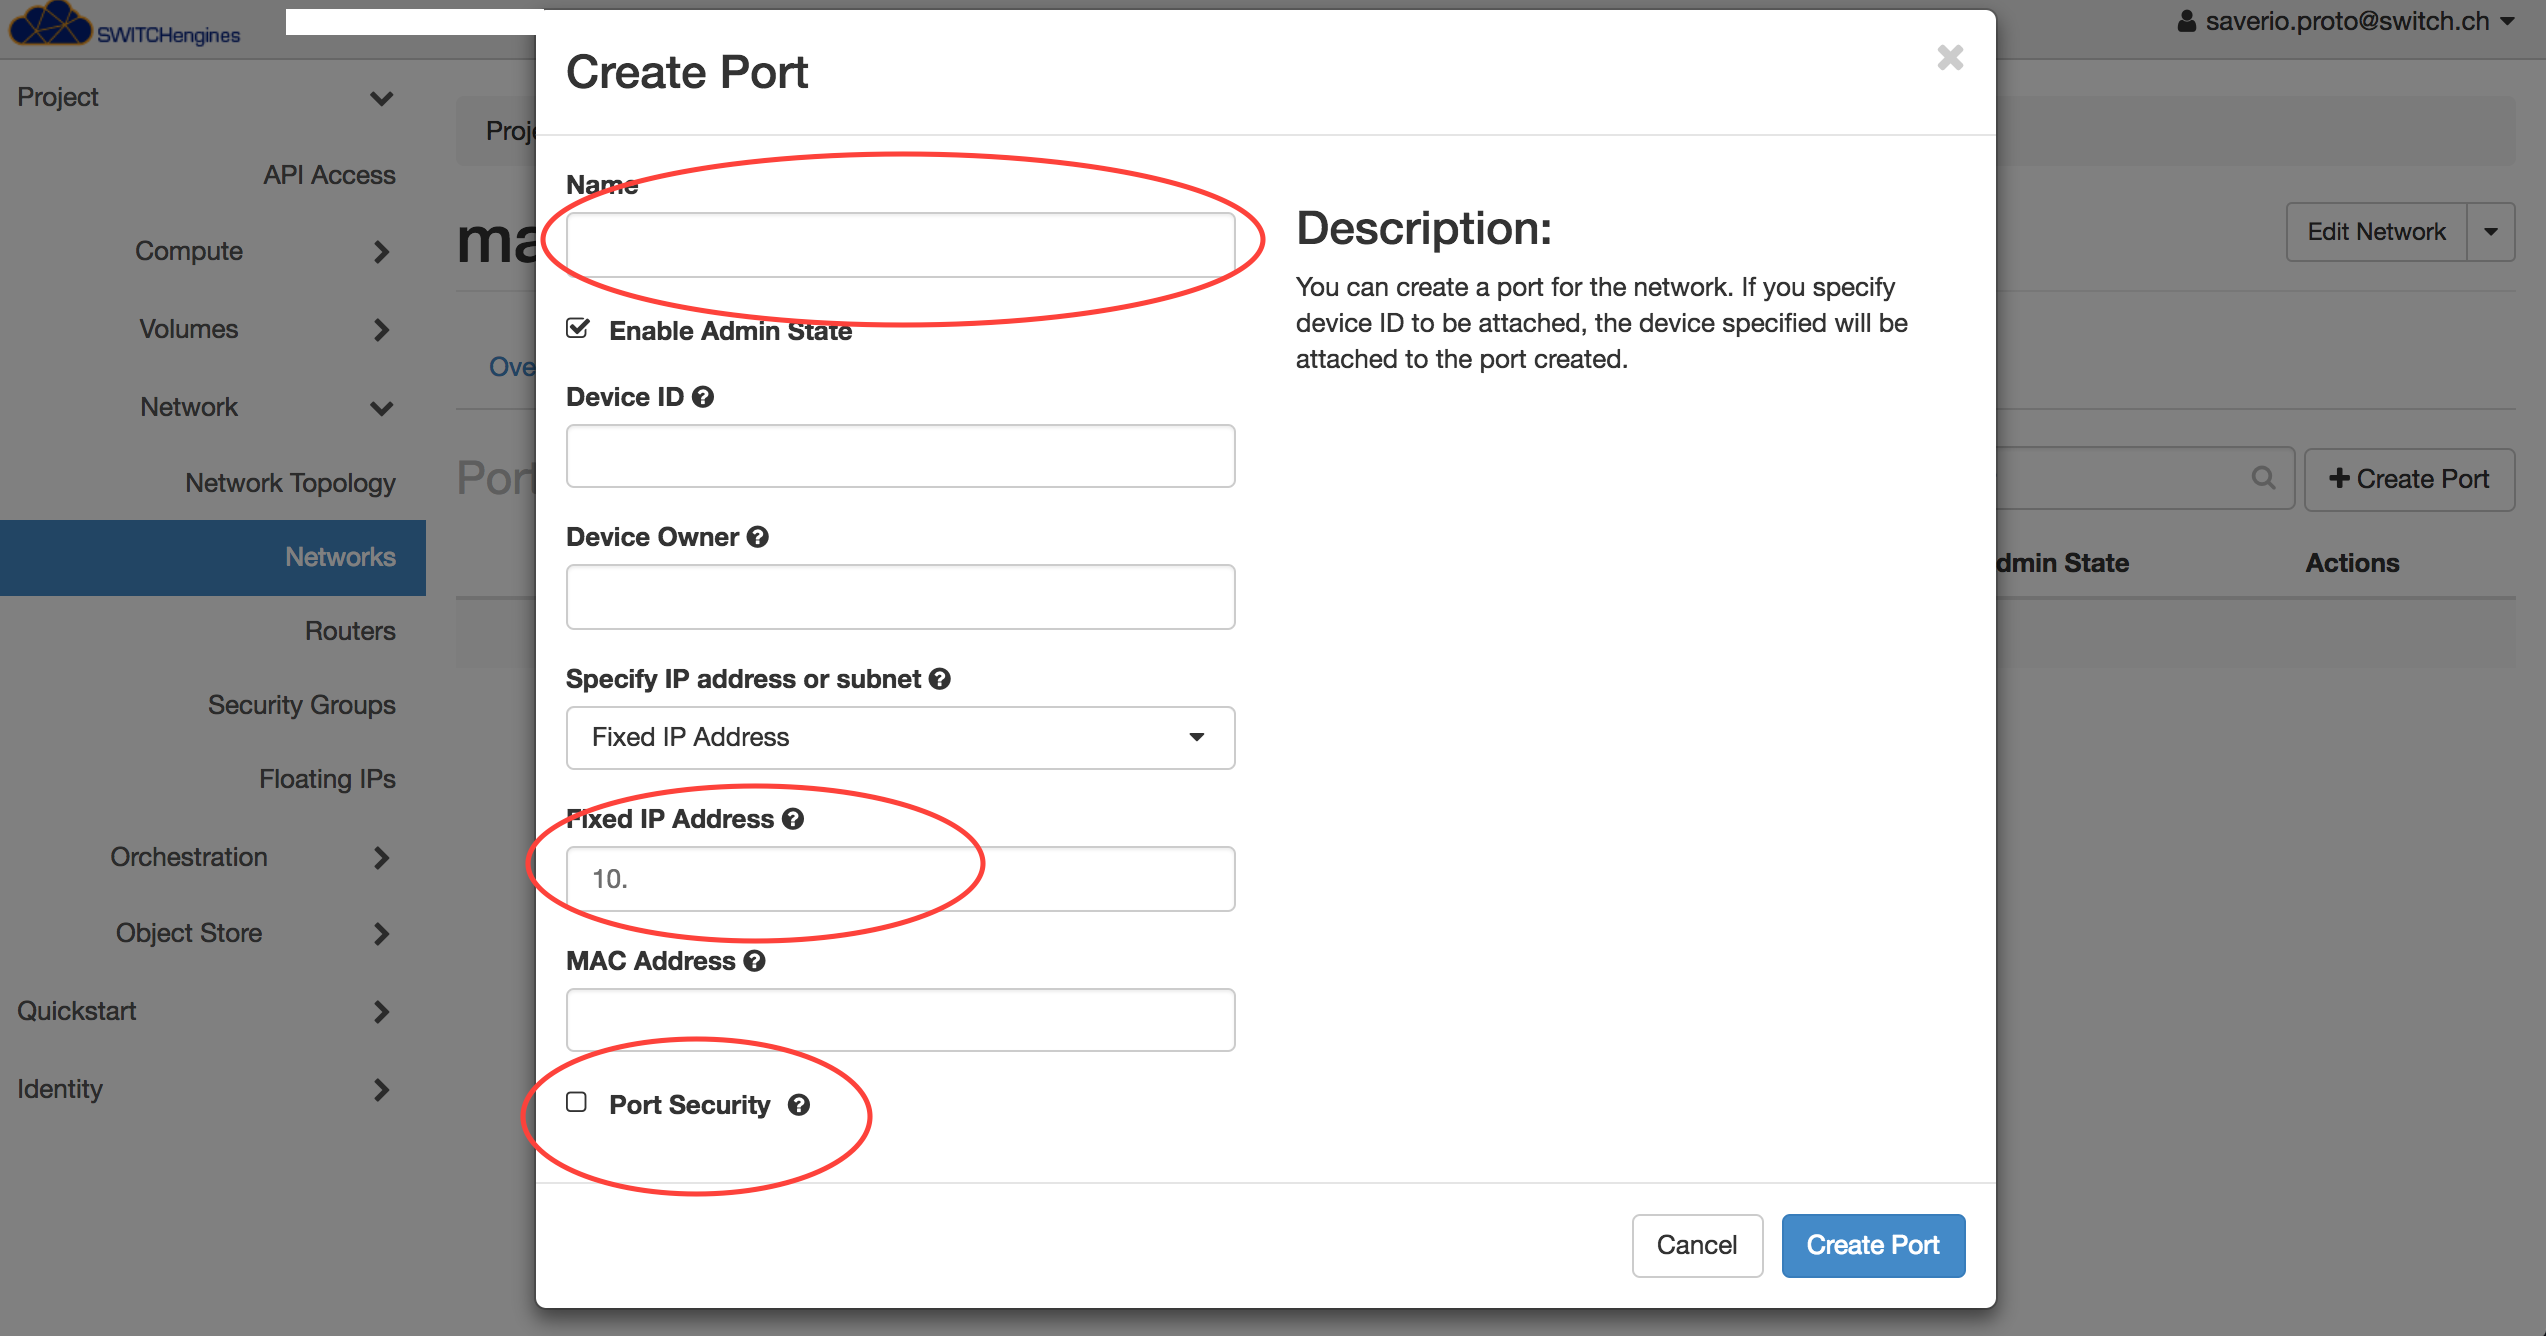
You can now configure the name of the port, select the option "Fixed IP address" and write the address in the next text box. If you want to disable the security groups for this port uncheck the Port Security option.
After clicking "Create Port" you will see the list of all the existing ports. Make sure the data is correct, or go back to edit the port.
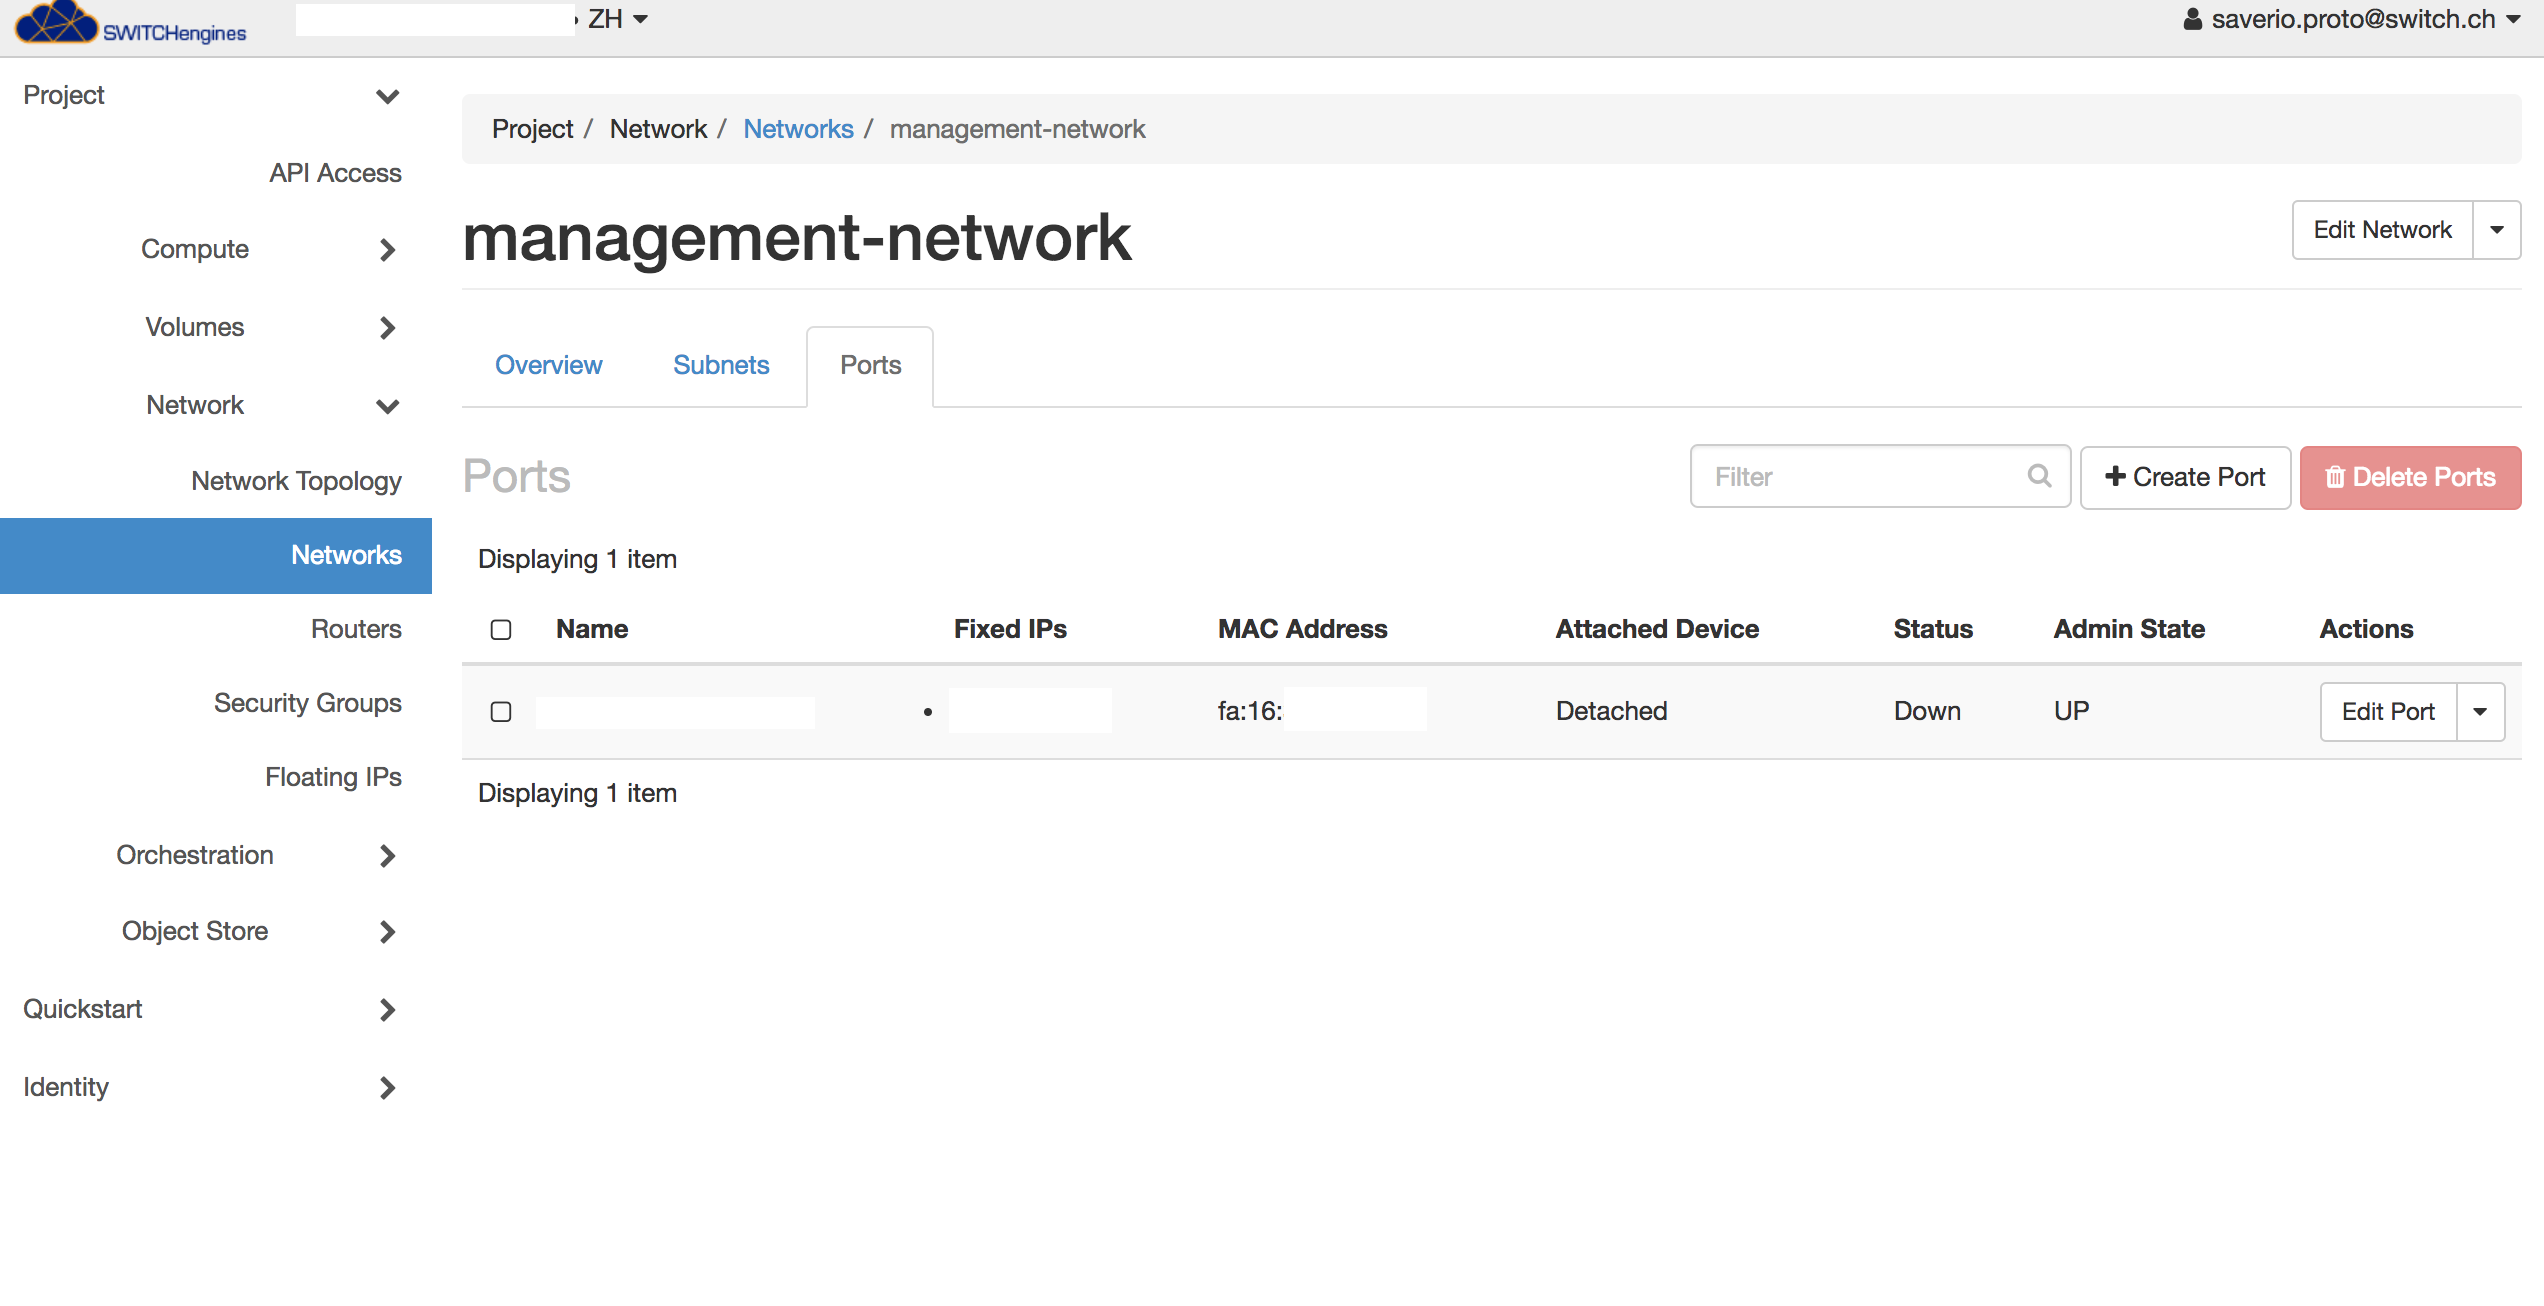
Now your port is created and the IP address is reserved. To use the port with an instance, use the "Launch Instance" menu. You find this menu in the Compute section:
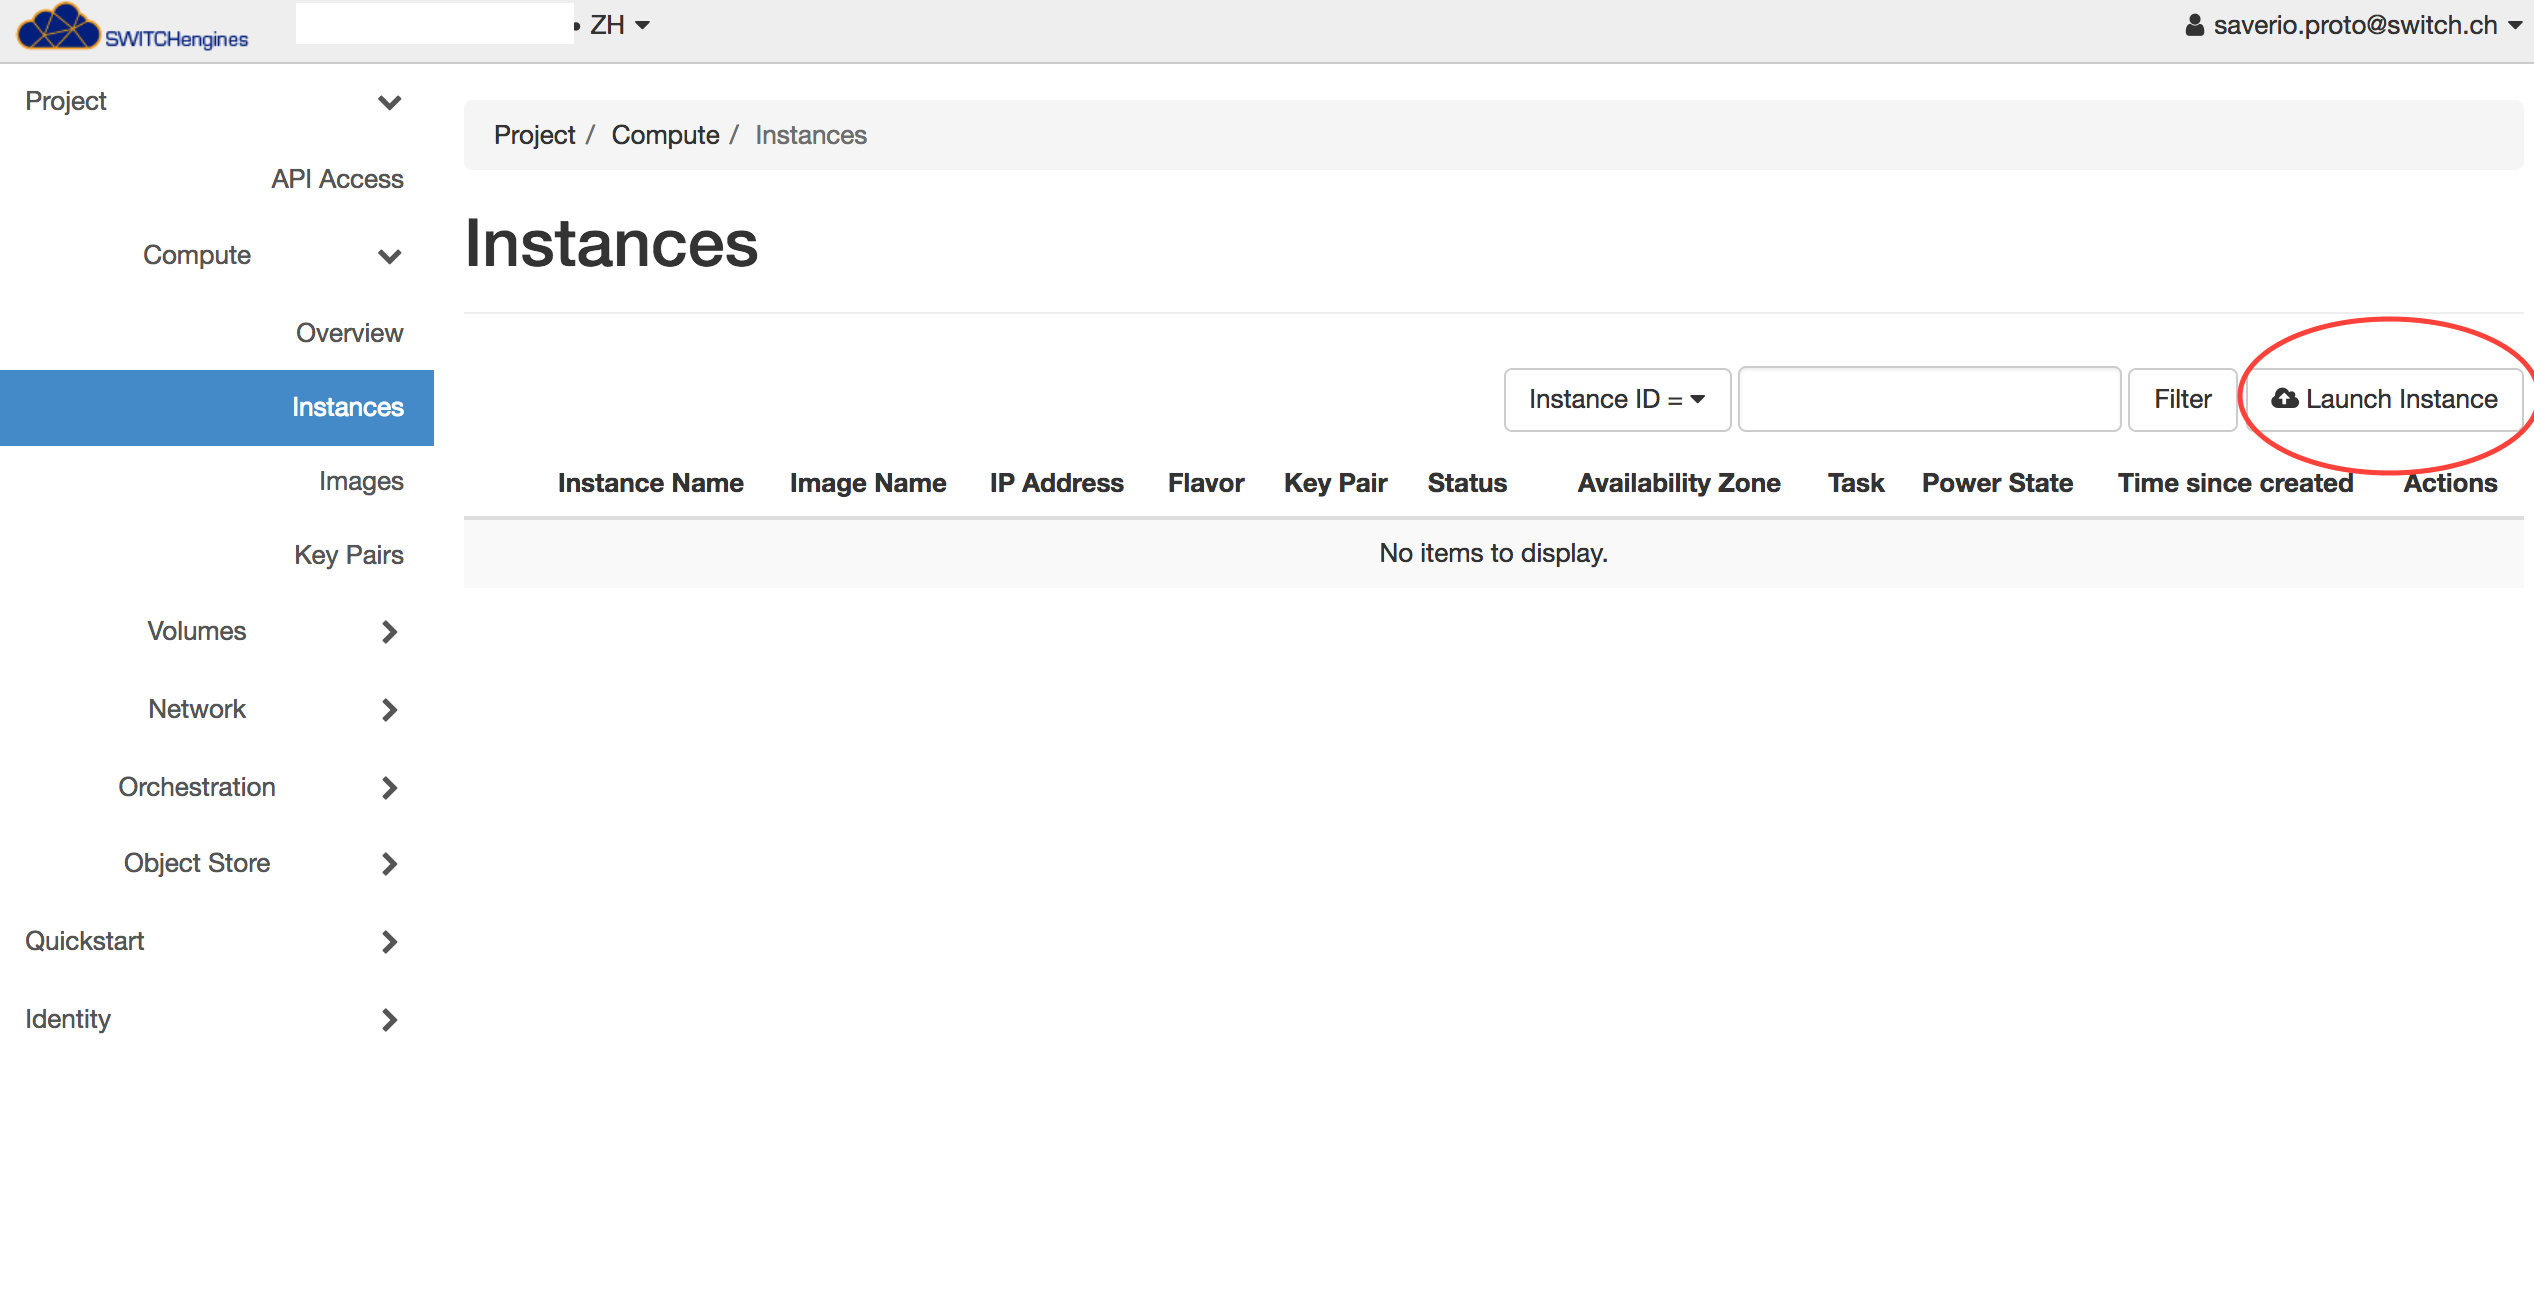
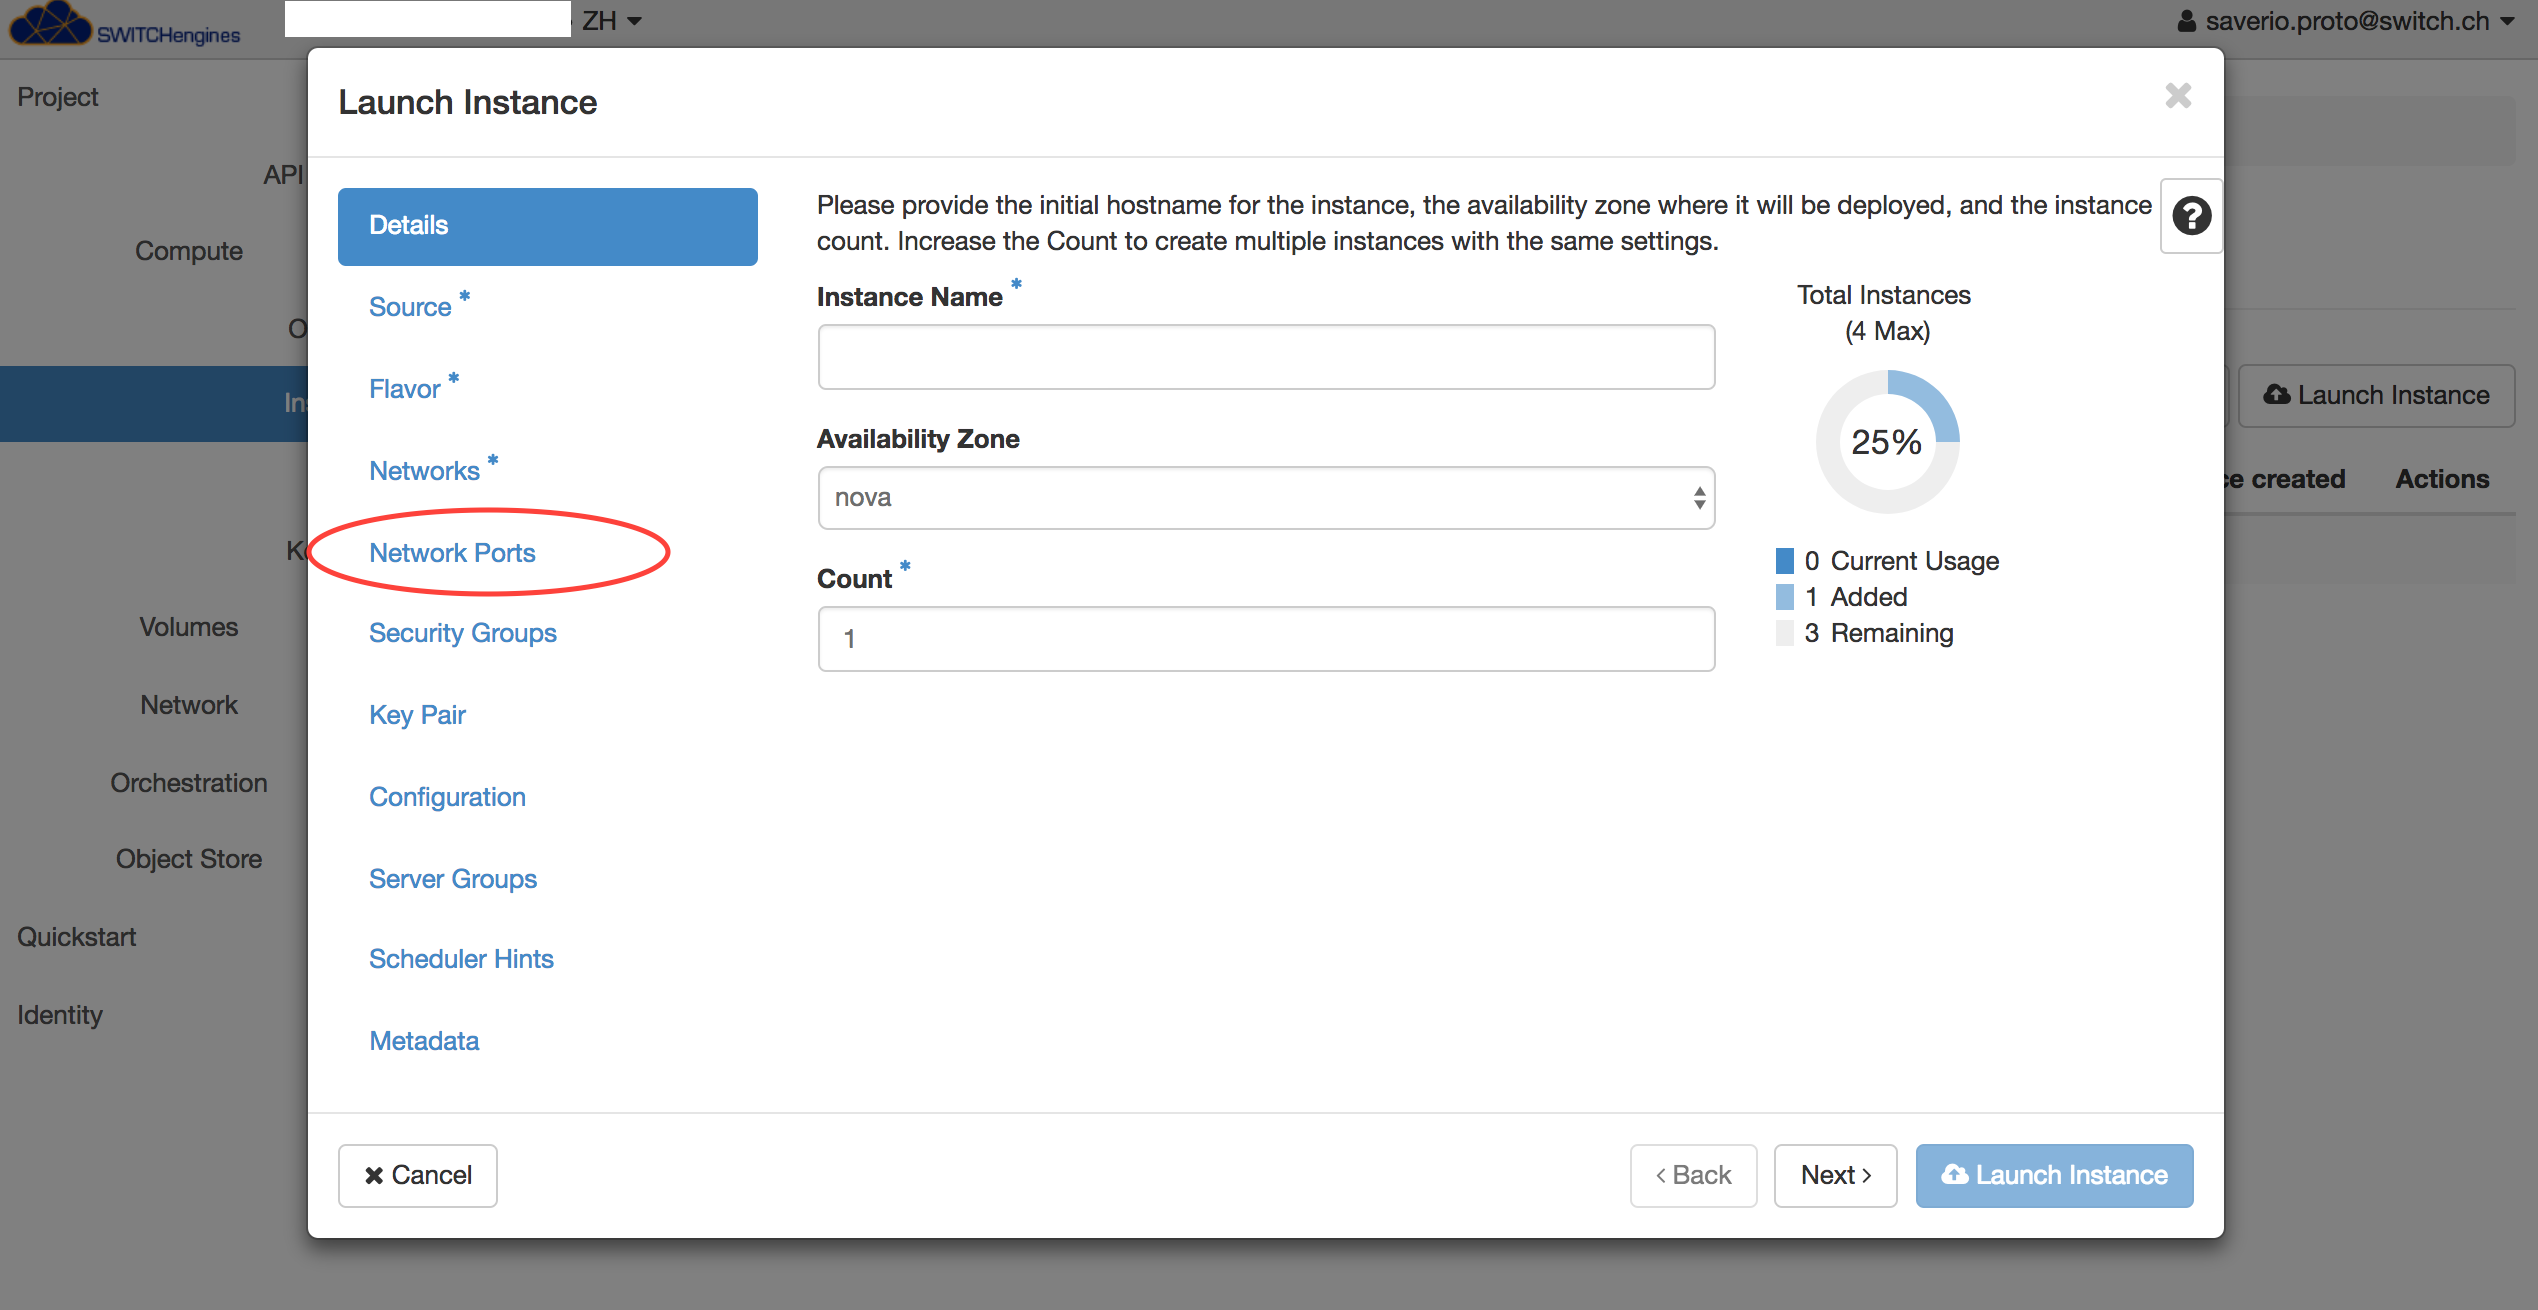
You can select all the options as usual when launching a new instance. However for the network configuration dont use the "Networks" menu, but skip directly to the menu "Network Ports".
Here you can select the previously created port, and attach it to your instance clicking on the up arrow.
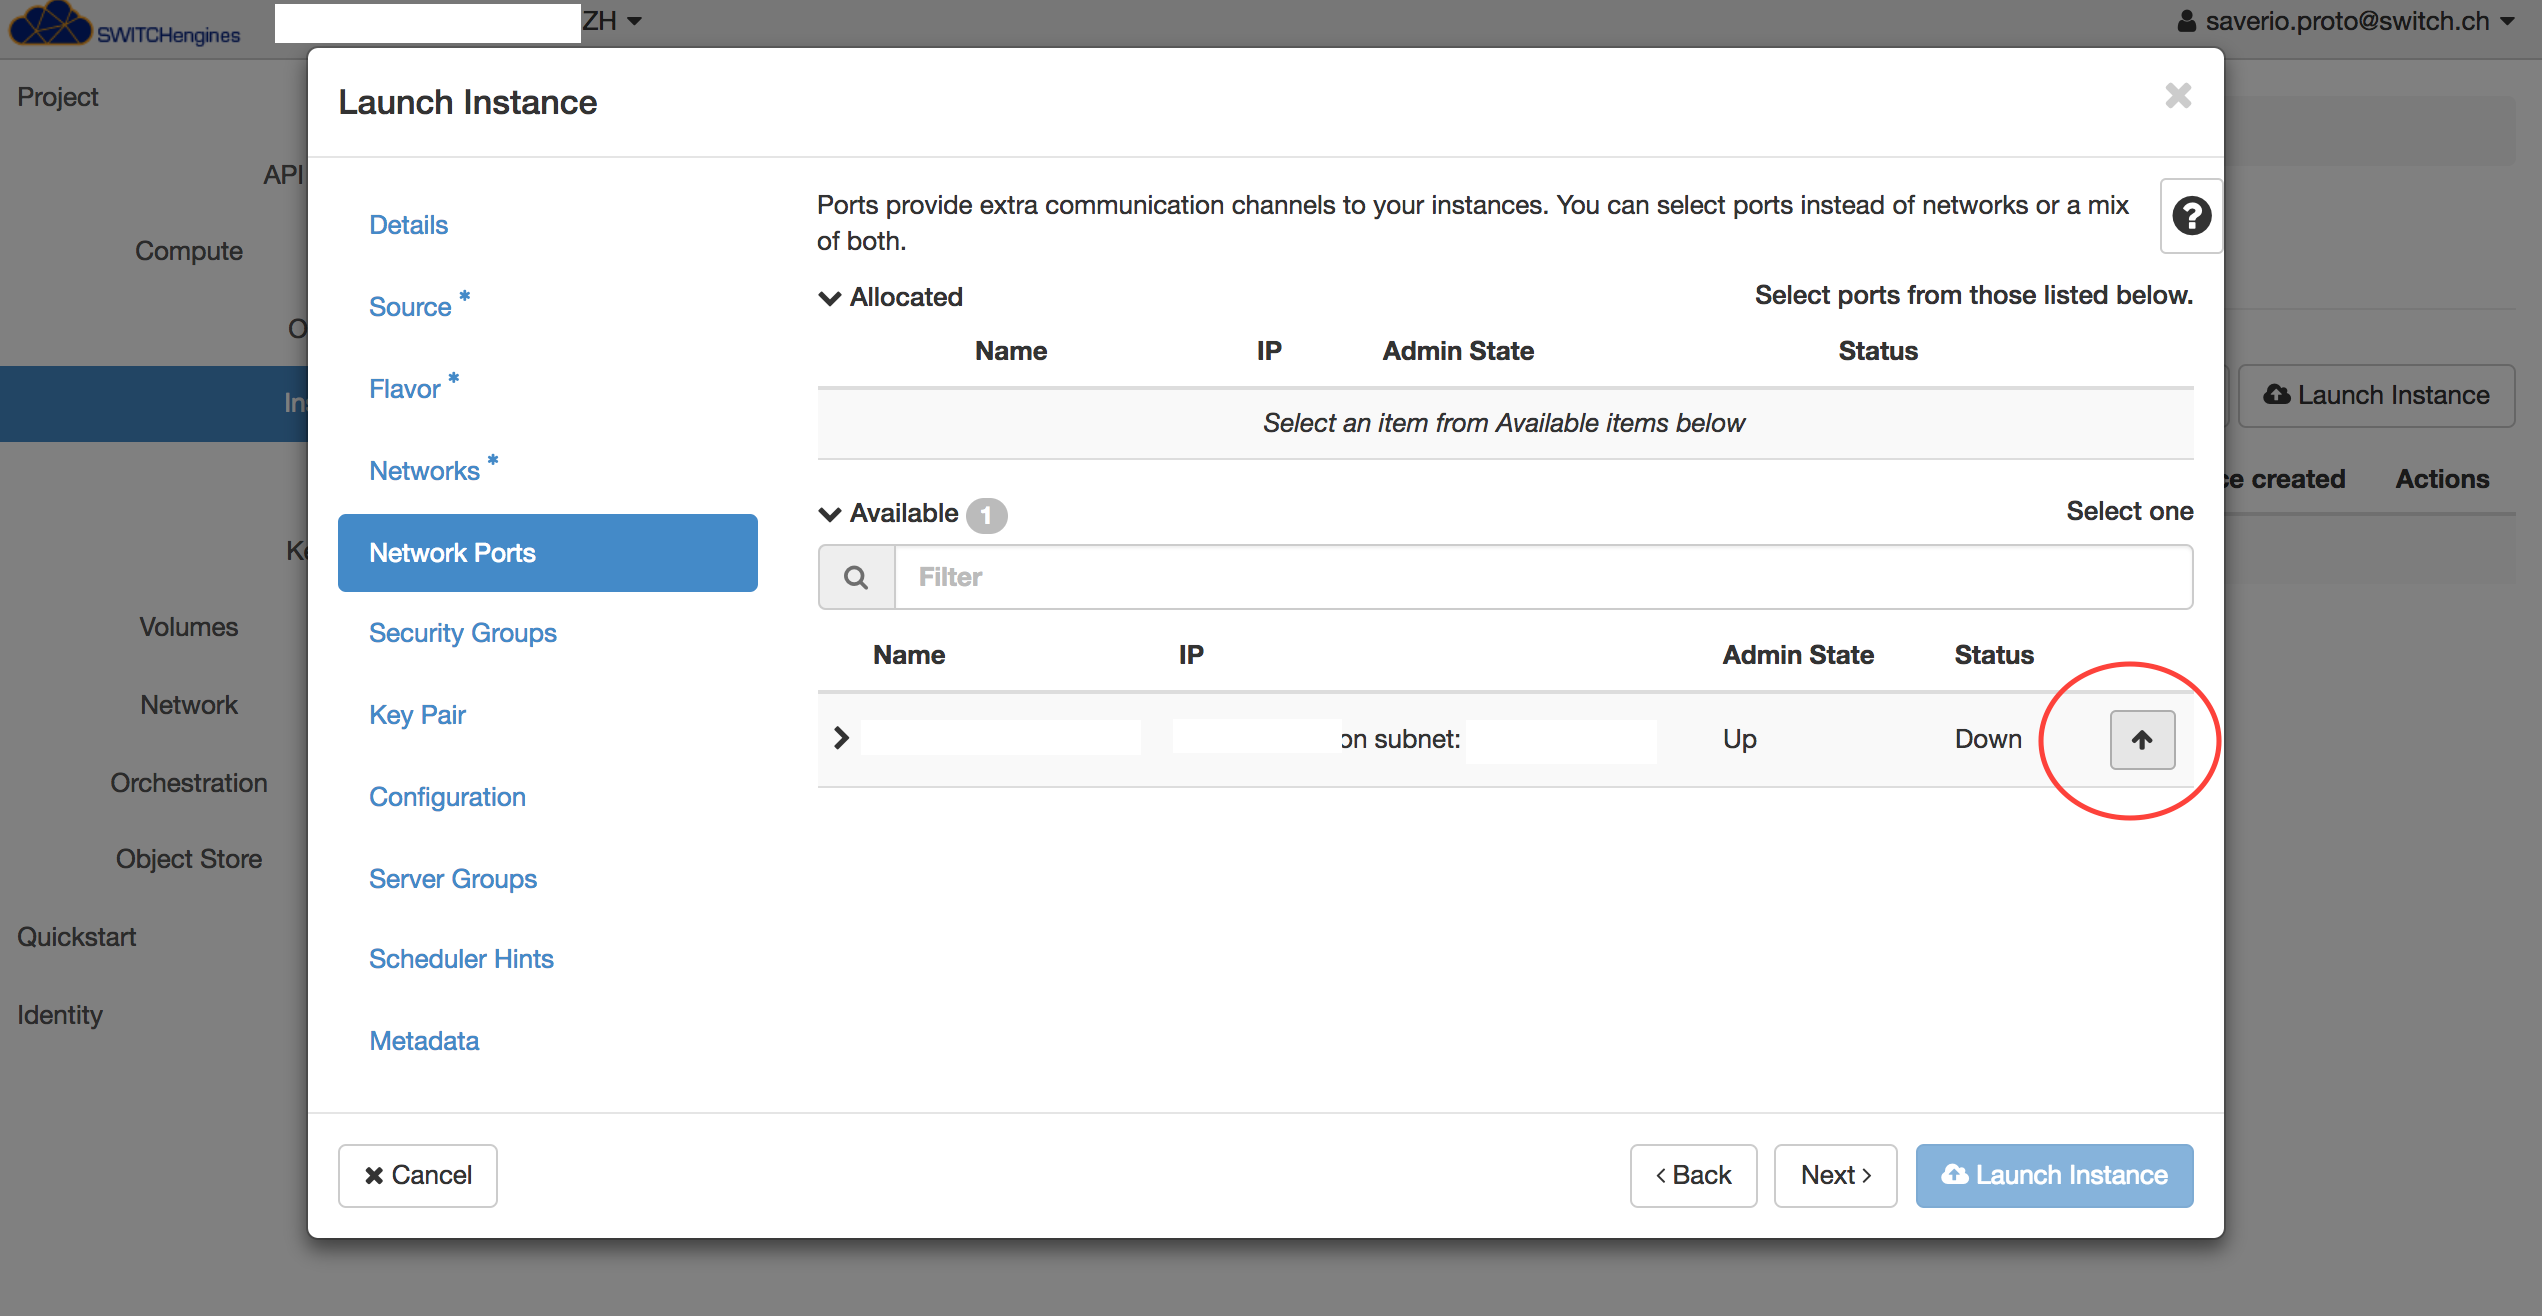
Please note that you can attach multiple ports to your instance if needed.
These static ports will not be deleted if you delete the instance. To delete the port when you want to release the IP address, you should use the network menu.
Troubleshooting
After the instance is running if you have problems logging in with SSH to your instance you can do some basic troubleshooting.
Click on the instance name and navigate to the log tab and to the console tab. You can have a look at the log to check that the instance obtained correctly a network address via DHCP. The console should present to you a login prompt.
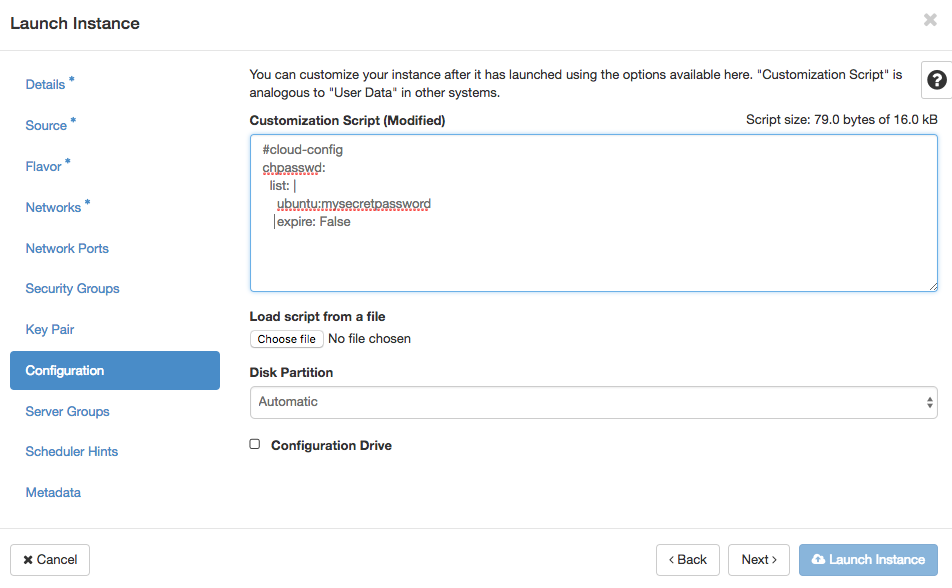
By default password login is disabled on SWITCHengines images. If you need to login to an instance to troubleshoot a network problem, you can set a password at boot using cloud-init.
Start a new virtual machine , because cloud-init is executed only at the first boot of a virtual machine, and in the configuration tab enter your cloud-init code. In the example screenshot we show how to set a password for the user ubuntu.
You can now use this password to login into the instance from the web console. If you cannot ping your default gateway there could be a problem with the VPC tunnel between the university and SWITCH. If you can ping the gateway the tunnel is working, and you might not reach your instance because of a different network or firewall problem on the university network.
