Security and Access
Each SWITCHengines instance is protected by firewall functionality. The initial configuration is set to not allow any kind of traffic to access the virtual machine. In order to selectively open the ports that your machine needs, you need to use the “Security Groups” feature to manage firewall rules. A “Default Security Group” will be automatically assigned to all your machines to allow basic administrative functions. Click here to find out more about the "Default Security Group".
However, in a new setup where you are not using the Quickstart option, you will need to add additional rules for ICMP (Ping) traffic, and for SSH traffic if you run Linux or RDP if you run Windows.
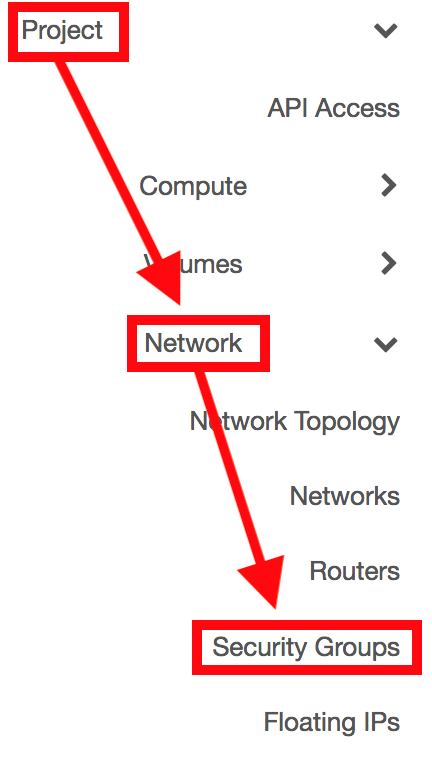
In the left column in the EnginesUI of the dashboard interface, click on Project -> Network -> Security Groups
Click on Create Security Group to add a new rule

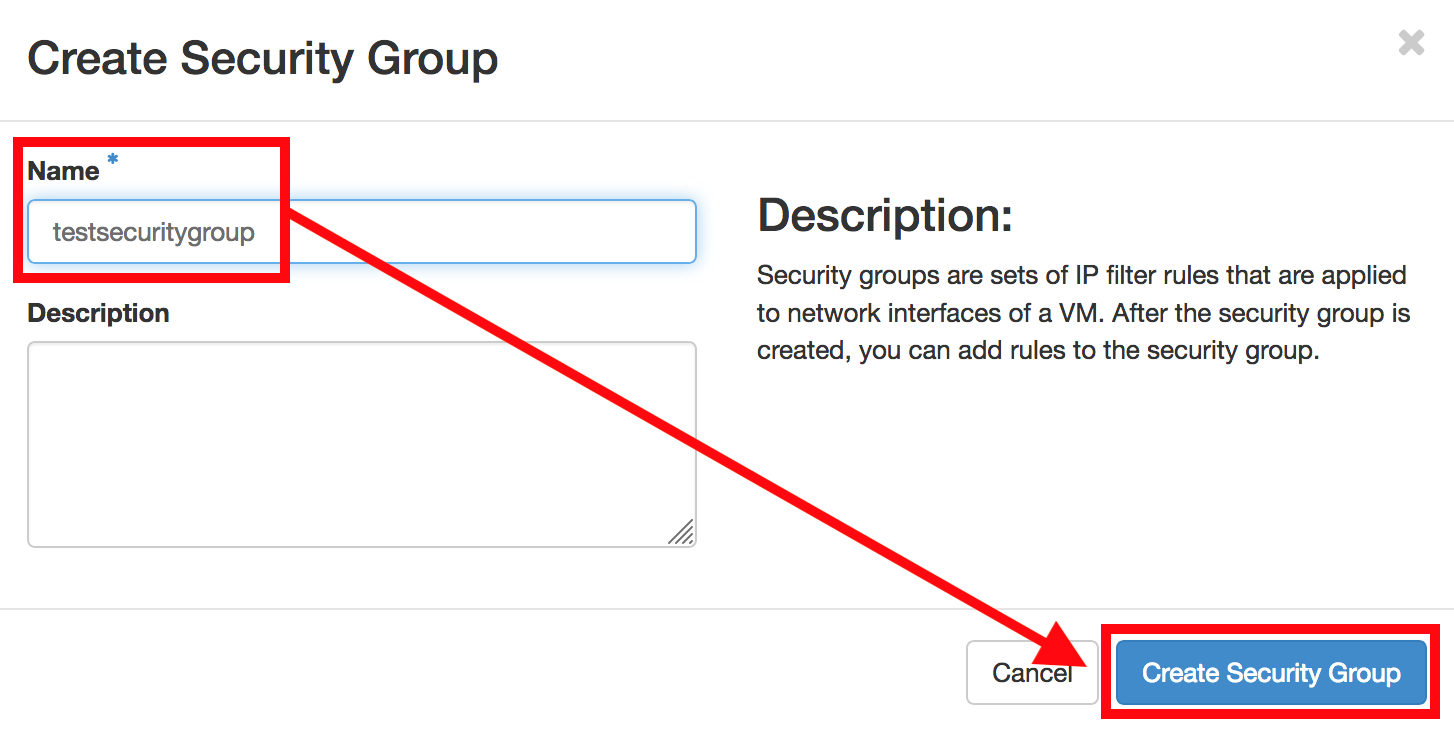
Enter a name for the Security Group and click on Create Security Group.
The created security group is being displayed. Select Manage Rules.
![]()
Click on Add Rule...

..and create a rule for
- SSH (port 22) for Linux VMs
- RDP (port 3389) for Windows VMs
Please find below an overview of the currently available rules:
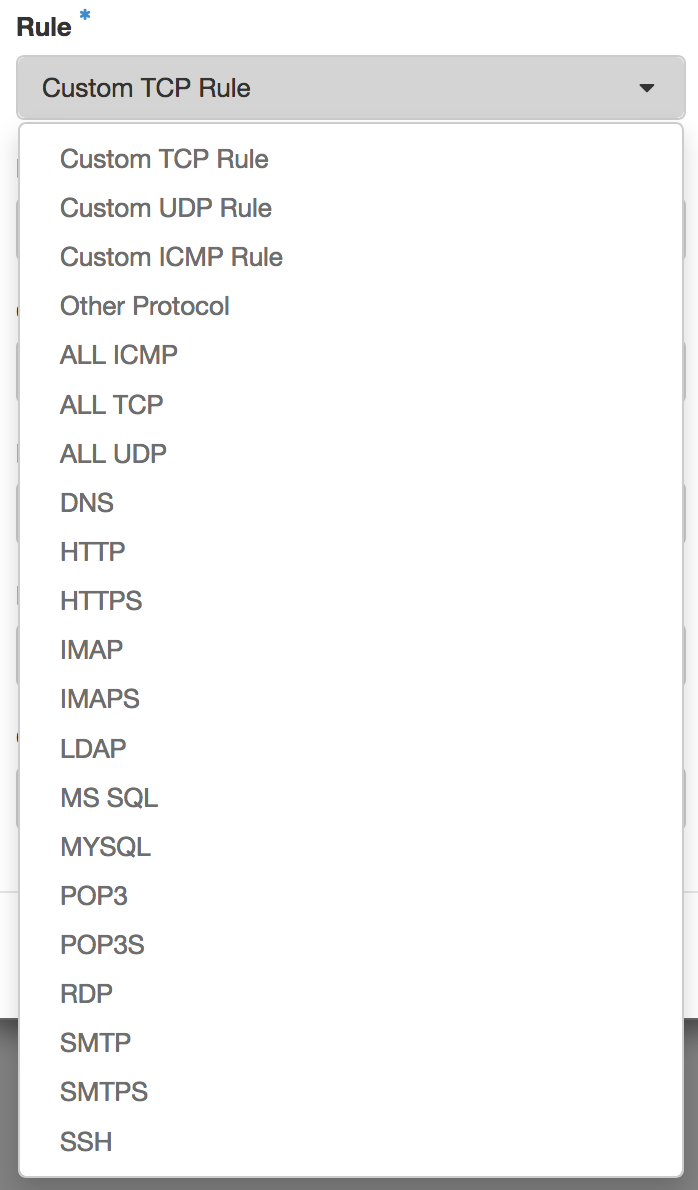
Tipp: You may want to specify the source of the traffic to be allowed via the above rule in the form of an IP address block (CIDR)!
Note: If you want to allow access to your instance over IPv6 as well, you need to specify additional rules with IPv6 address prefixes. To allow access from any IPv6 address, specify "::/0", which is the IPv6 equivalent of the default "catch-all" prefix "0.0.0.0/0" in IPv4.
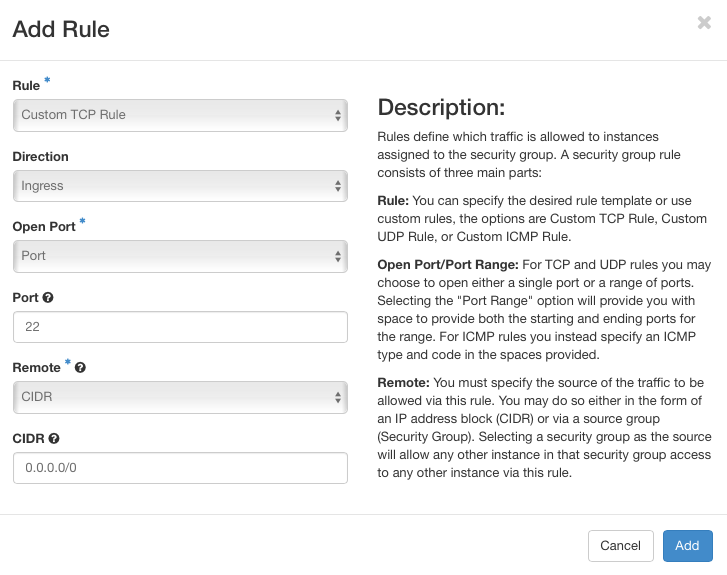
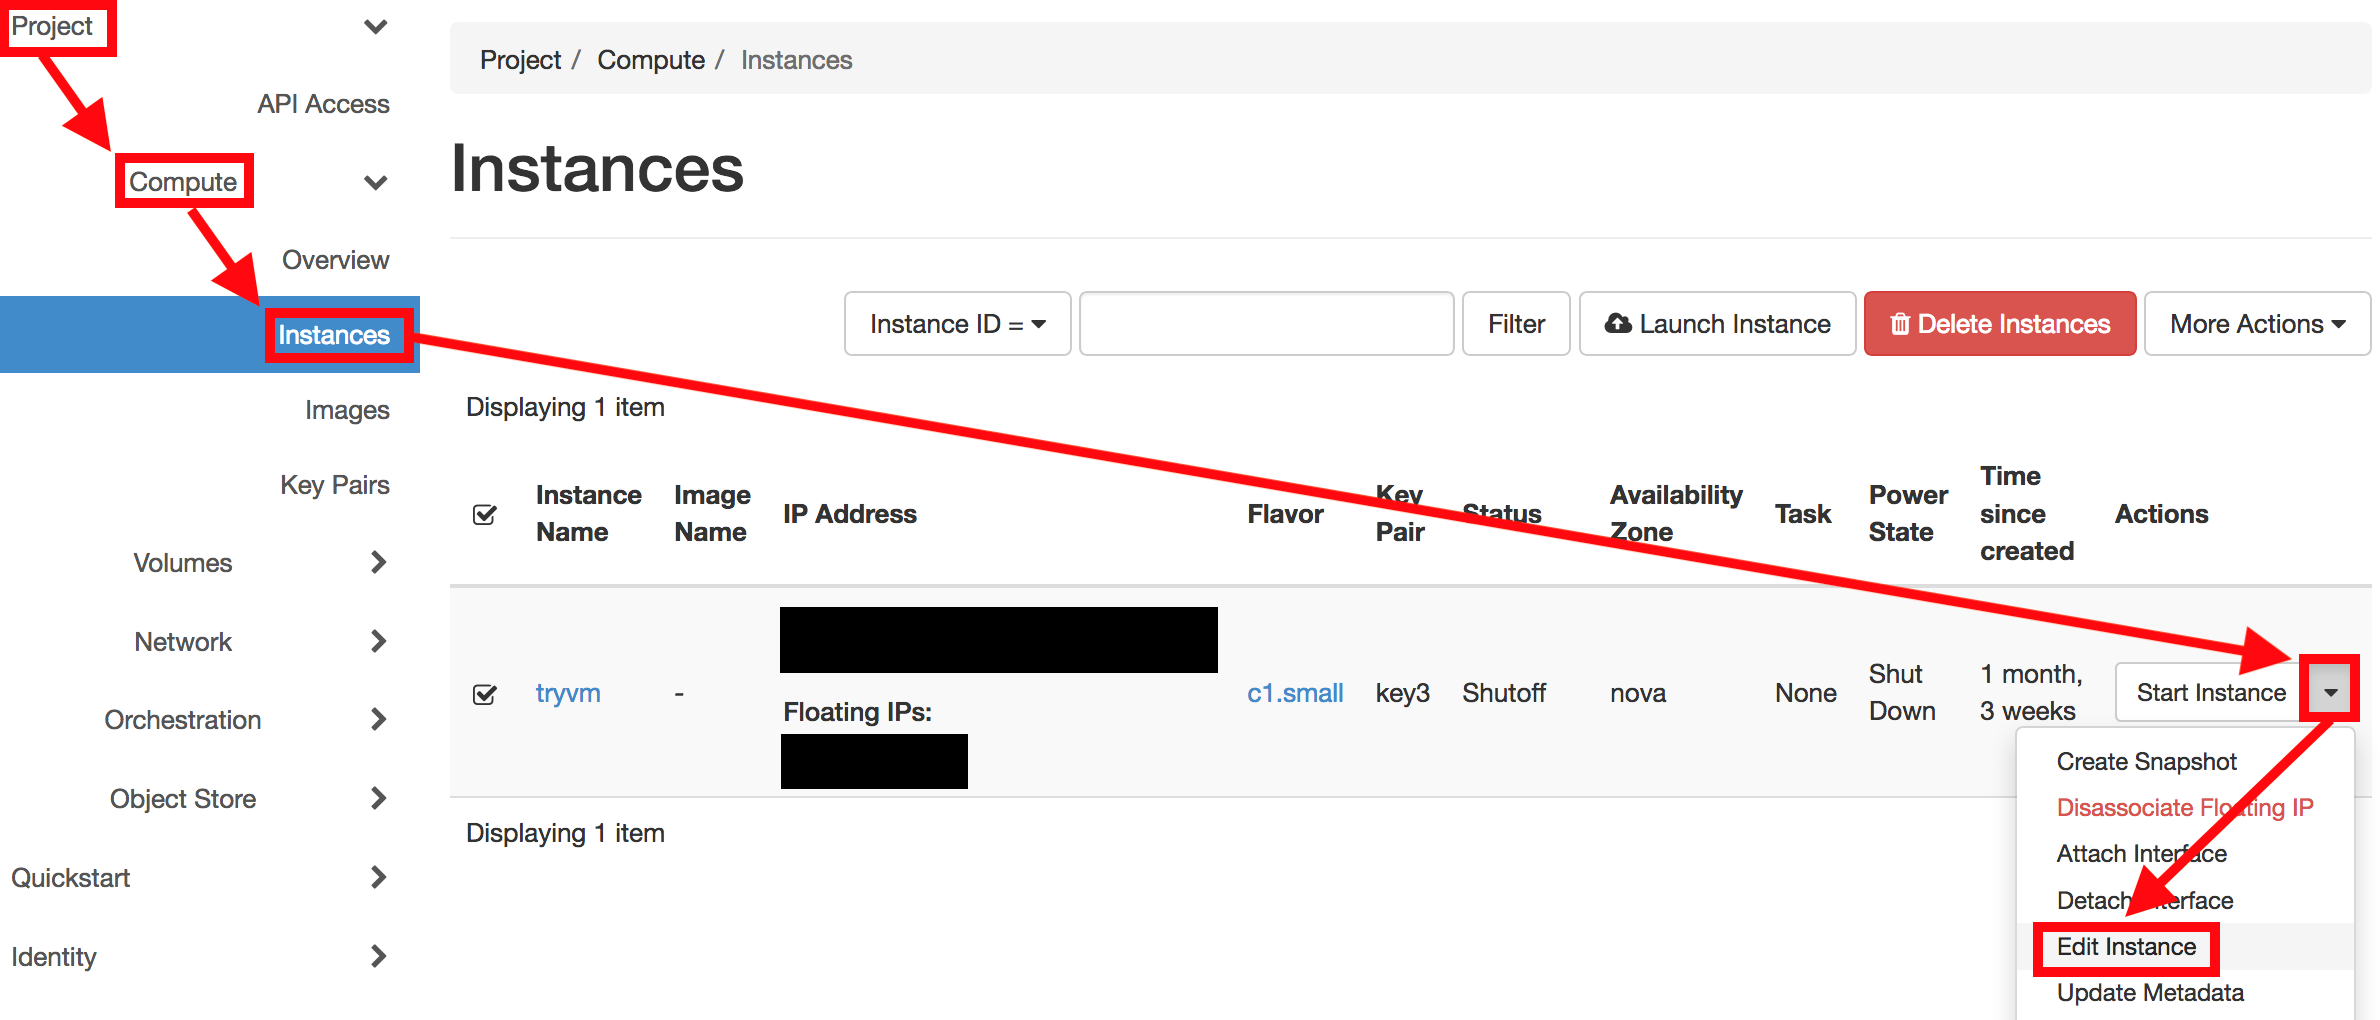
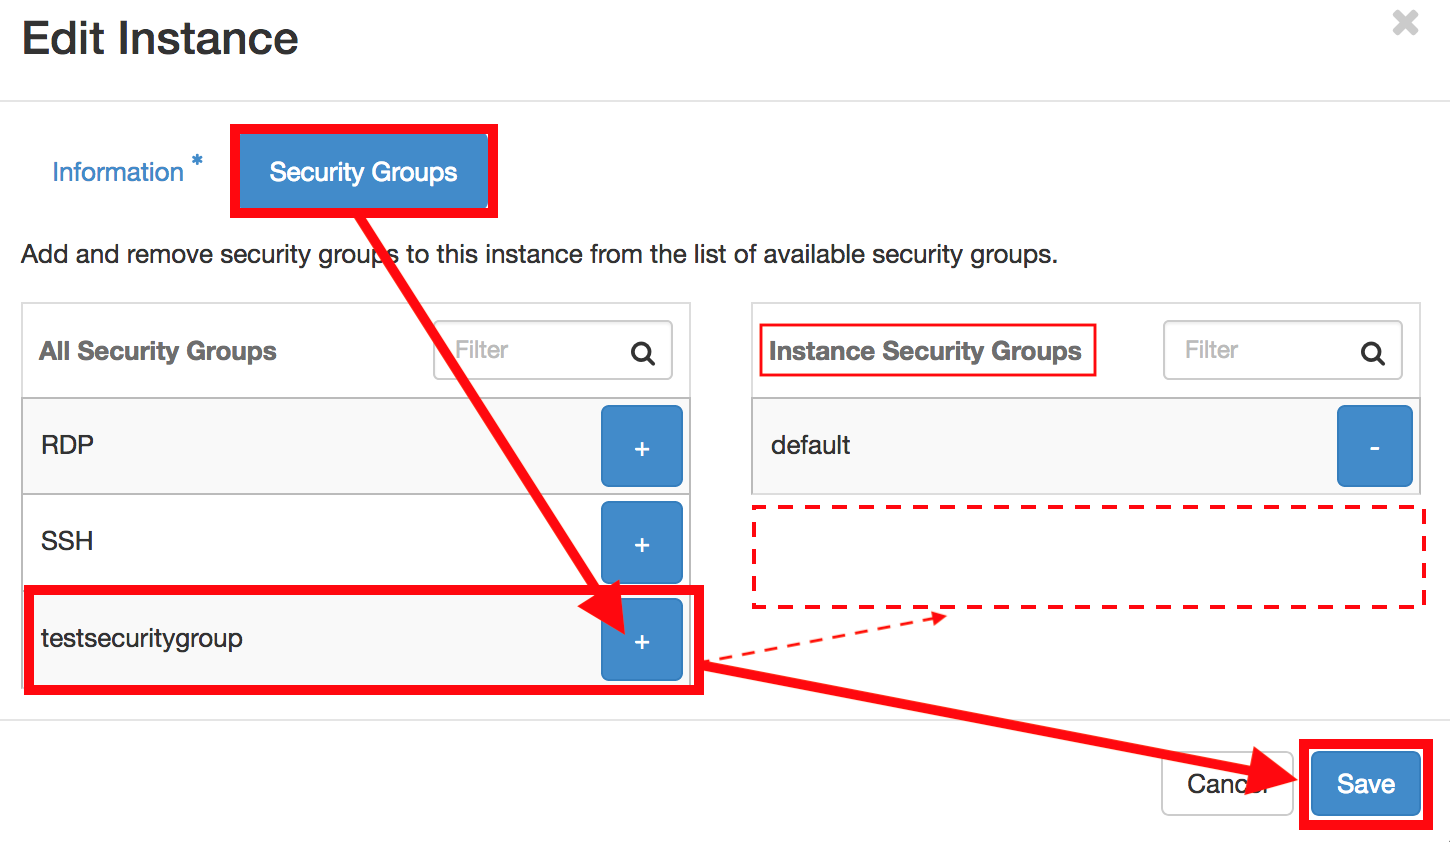
As soon as you have added the rules, your VM will be accessible on the specified ports.